Document Review - Export a Production - Gen 4
Document Review - Export a Production - Gen 3
Document Review - Export a Production - Gen 4
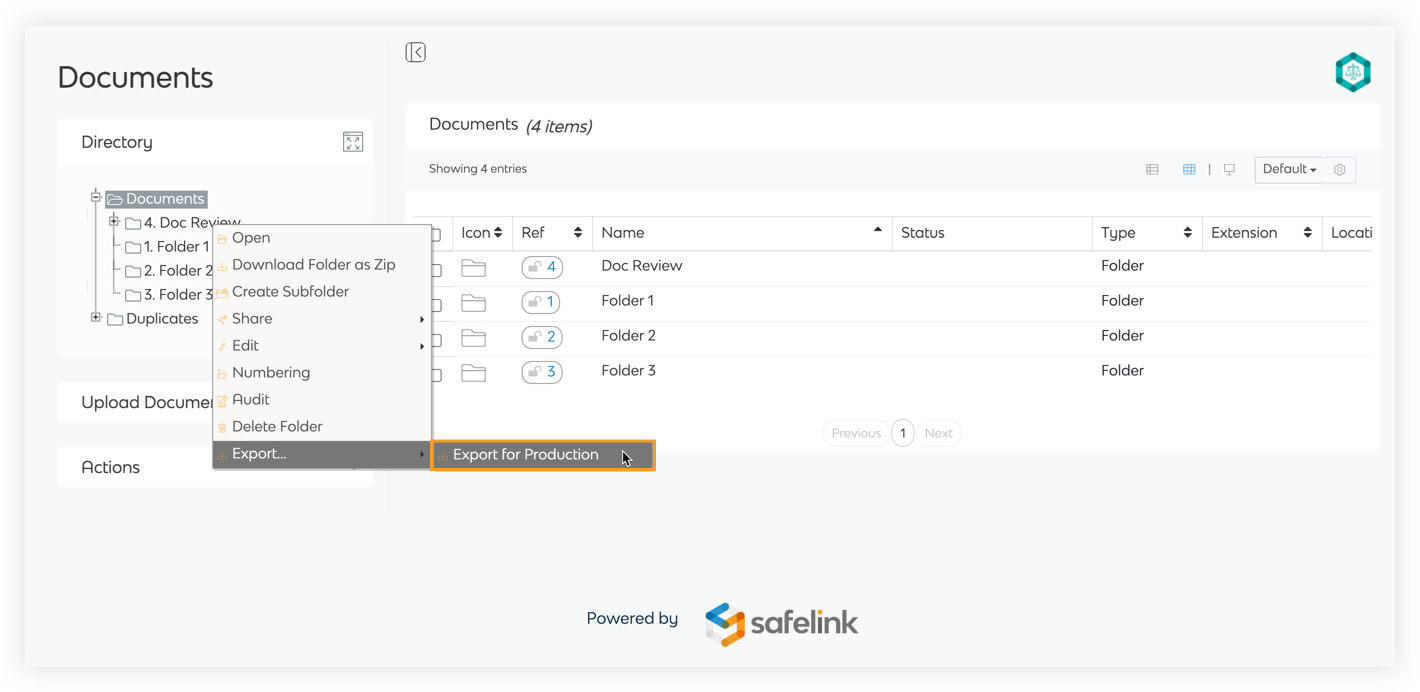
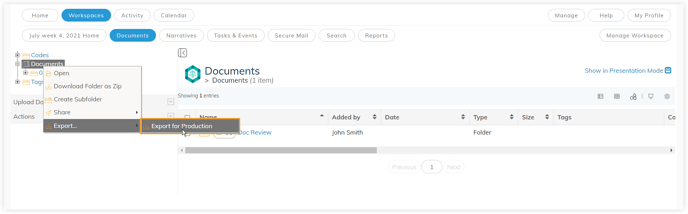
- Right-click a folder containing the files you would like to export. Select Export and then Export for Production.
- This is the Export for Production screen. The folder you are exporting will be displayed here.
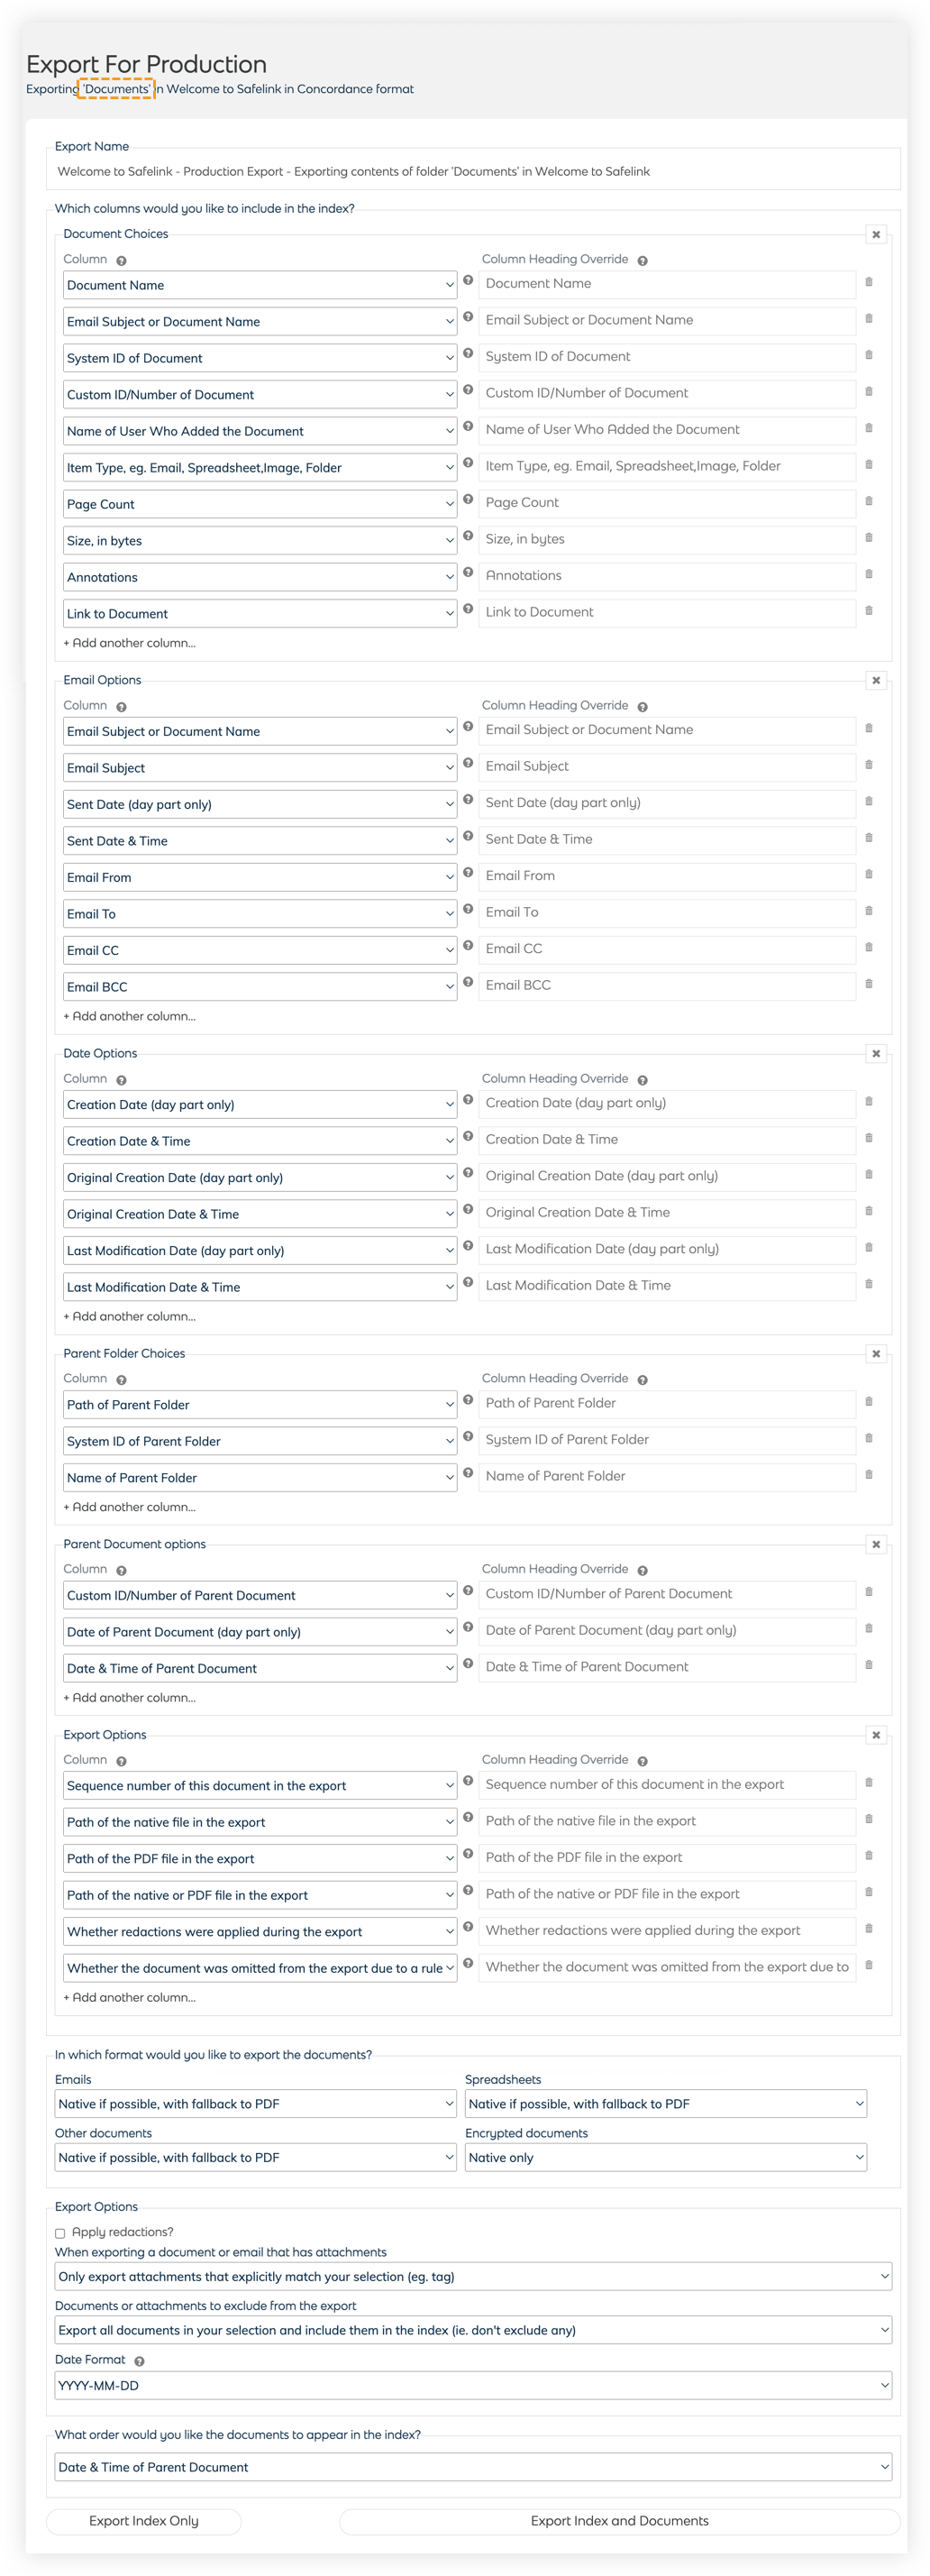
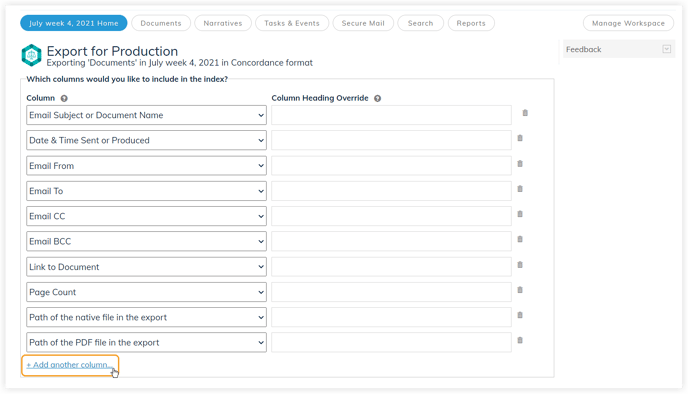
Which columns would you like to include in the index?
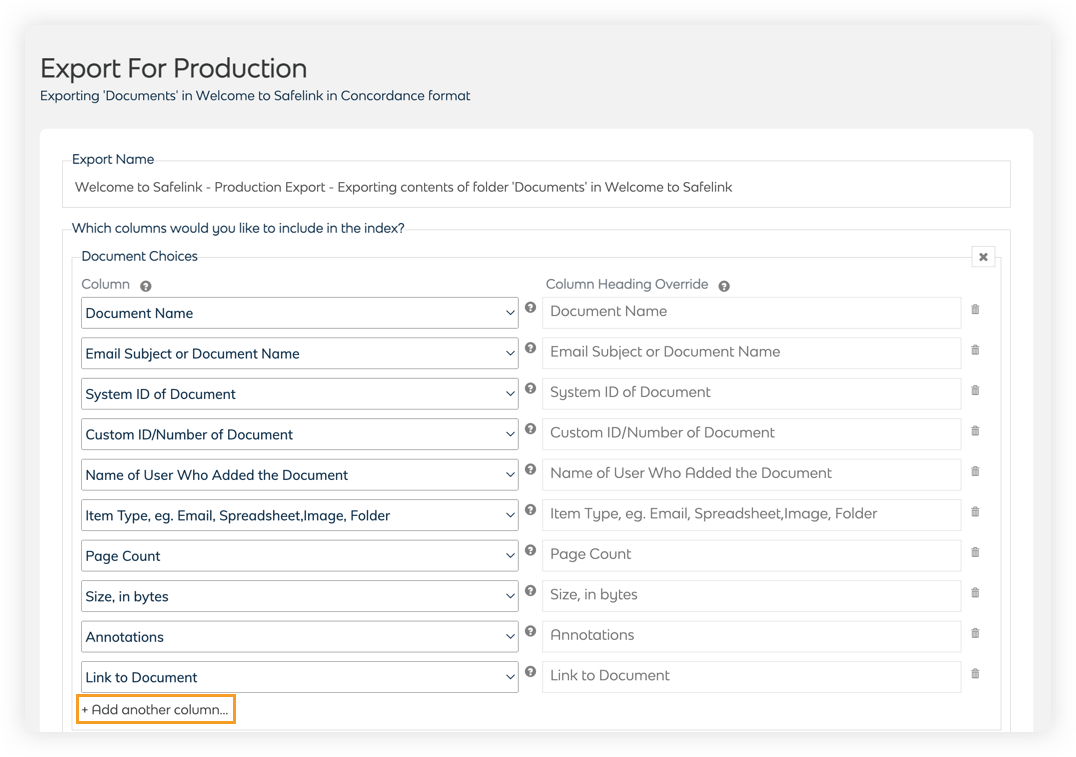
- Next, add some column headers to your production. The column headers you select will determine what data is shown in your production. You can export more columns by clicking Add another column. You can view all possible column headers here.
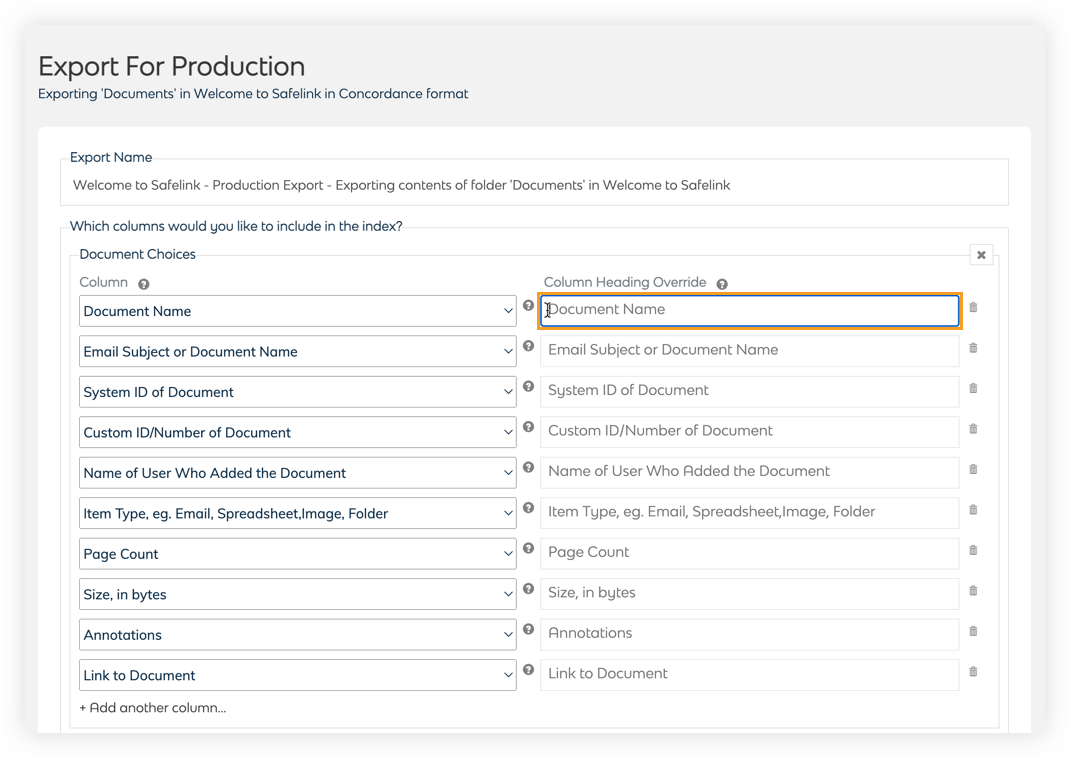
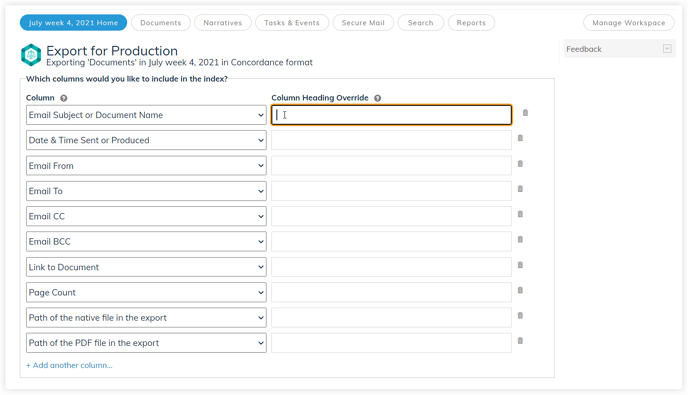
- You can rename the column in your production by entering a value in the field below. If you leave an entry blank, the default column name will be used.
We have created a sample set of column headers below.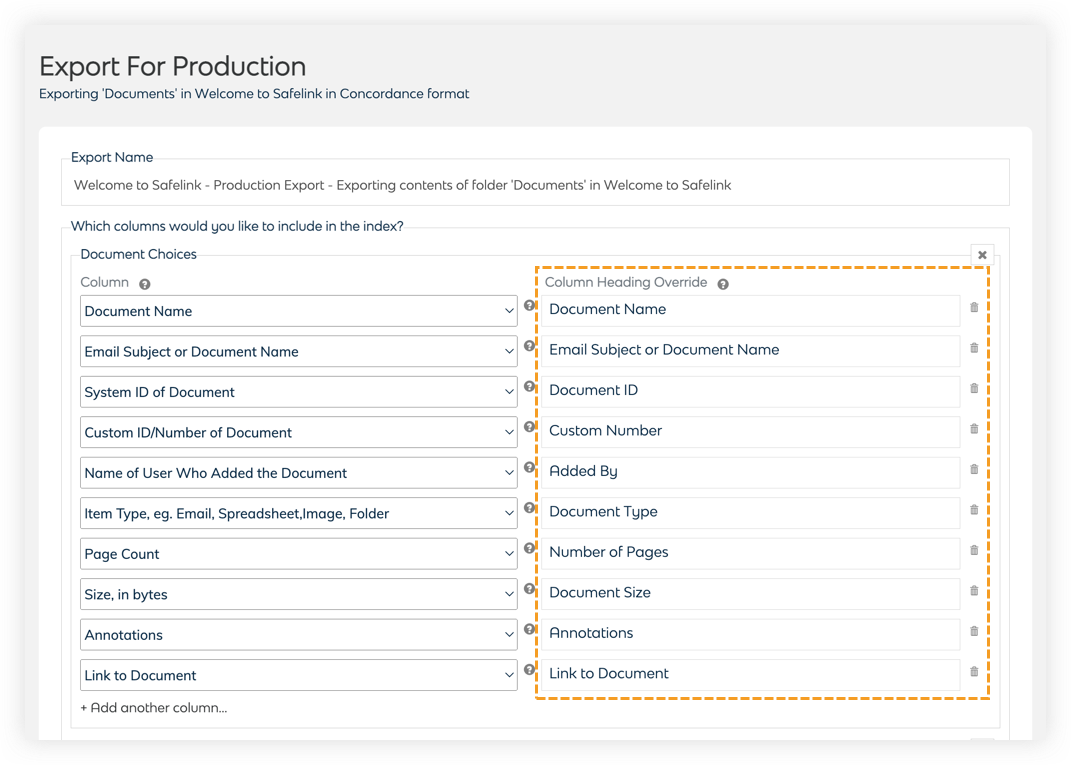
In which format would you like to export the documents?
- Select which format you would like to export your files. Emails, spreadsheets and other workspace documents have five export options. Encrypted documents can only be exported as native. It is advisable to select a document format with a fallback option. If there is no fallback option, some of your documents may not end up in your production export.
Emails, Spreadsheets, Other documents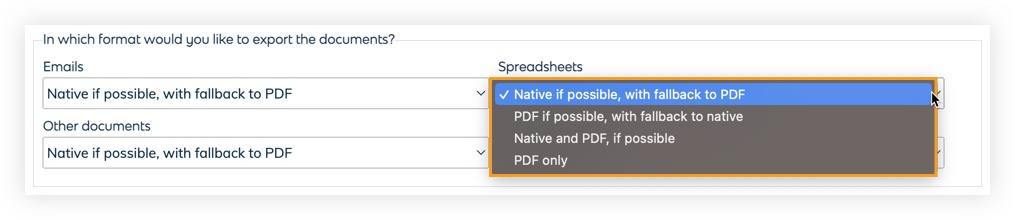
Native, if possible, with a fallback to PDF - The system will export your files in the format they were uploaded. If the system cannot export your files in their original format, they will be exported as PDFs.
PDF, if possible, with fallback to native - The system will export your files as PDF documents. If the system cannot export your files as PDFs, your files will be exported in the format in which they were uploaded
Native and PDF, if possible - The system will export both the files in their uploaded format and a PDF version of your workspace files.
Native only - The system will export your file in its original format or the format it uploaded.
PDF only - The system will export your files as PDF documents.
Note: If you select PDF only, documents (eg. mpv, video, password protected, etc) that could not be exported as pdf will not be included.
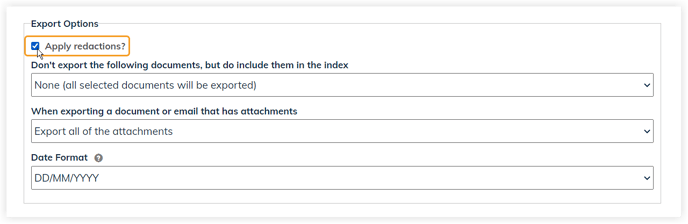
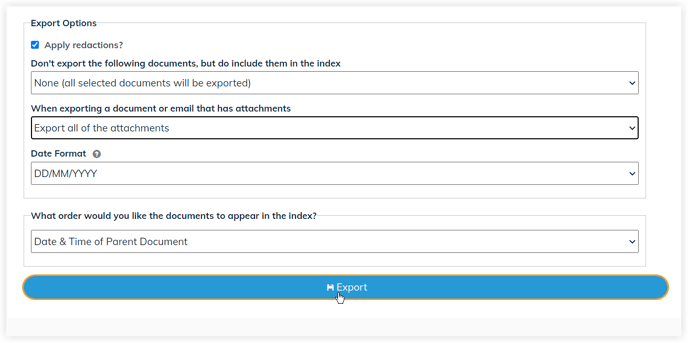
Export Options
- Tick Apply redactions to export redacted documents in your production. Documents with redactions and watermarks will be converted to pdf.
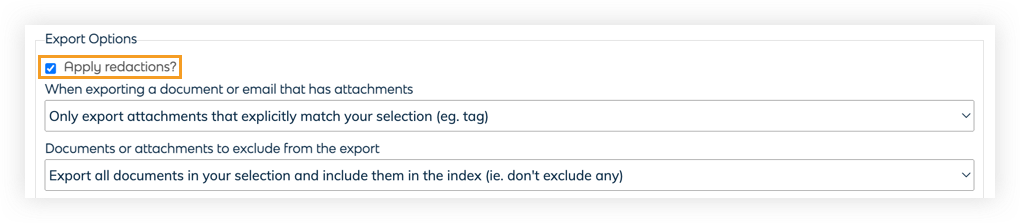
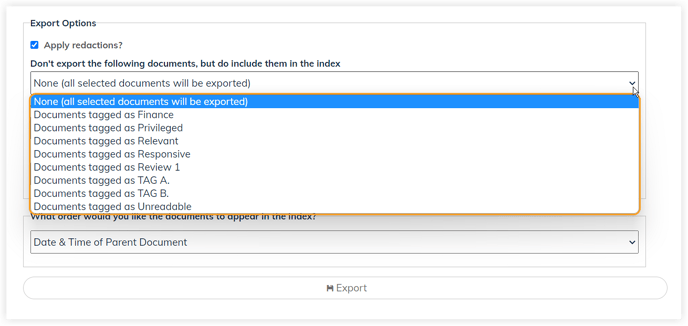
Note: Documents which include redactions will always be exported as a PDF. - Select the documents or attachments to exclude from the production export.
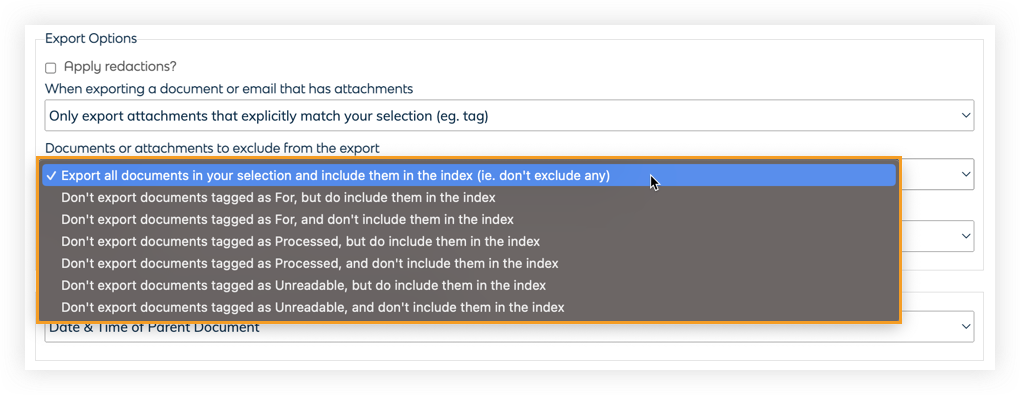
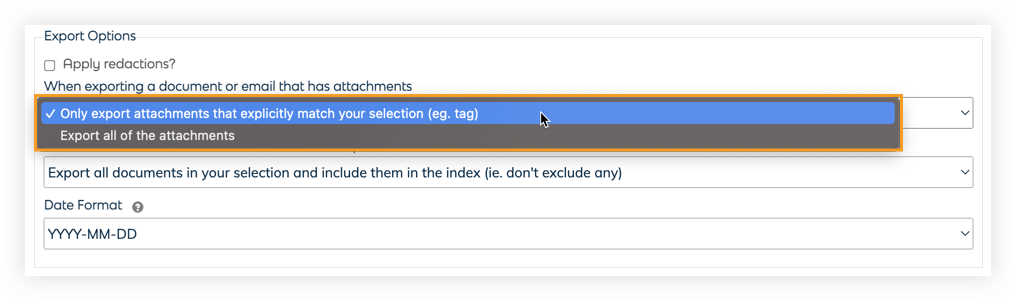
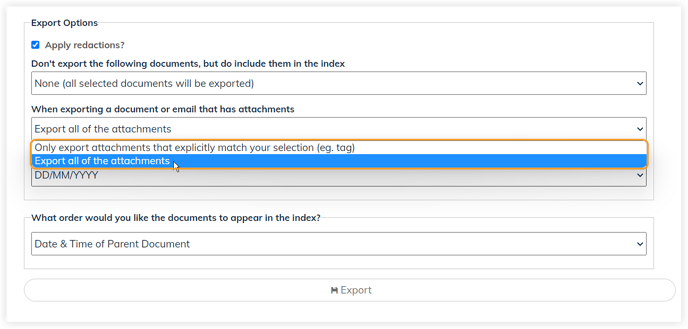
Note: If you have the same exact documents under a different sub-folder, only one copy of the document will be included. - Next, select system behaviour when exporting a document or email with attachments. Click here for detailed information on how the attachments are handled during the production export.
- Only export attachments that explicitly match your selection (eg. tag) - Only export attachments you have selected and marked.
- Export all of your attachments - Export all email attachments.
- Select which export you need.
Export Index Only - The system will generate the Index report only.
Export Index and Documents - The system will generate the Index report and the documents.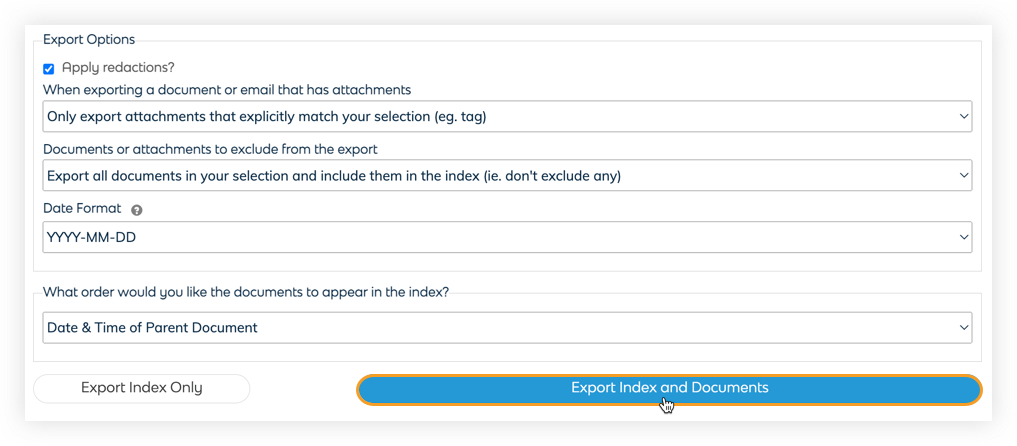
Production
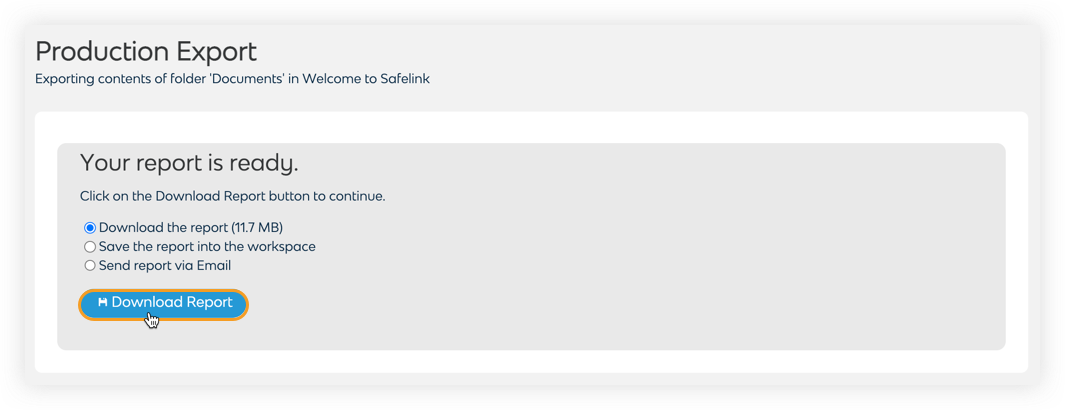
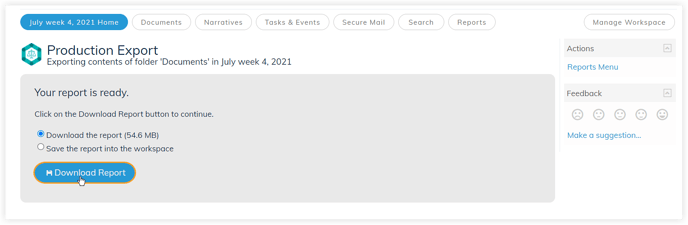
- The system will build your report. When it is finished, tick Download the report to download a copy to your computer, or Save the report into the workspace and select which folder you would like a copy to be saved. Next, click Download Report.
- Voila! Here is your production. Click on the. CSV file to view your column headers and corresponding data.
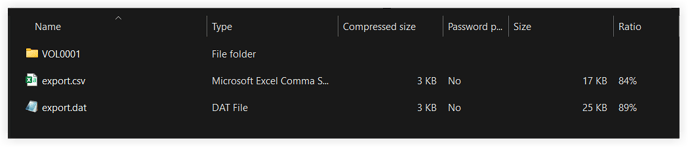
* .CSV File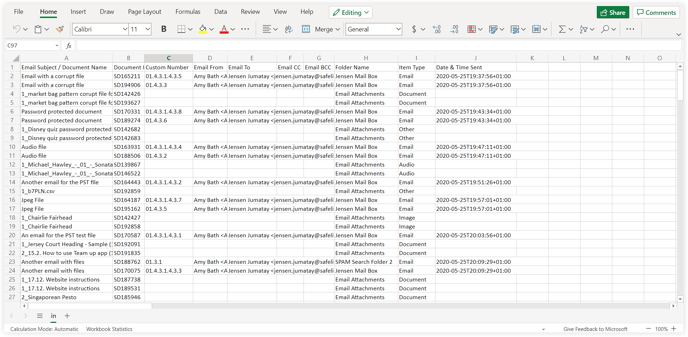
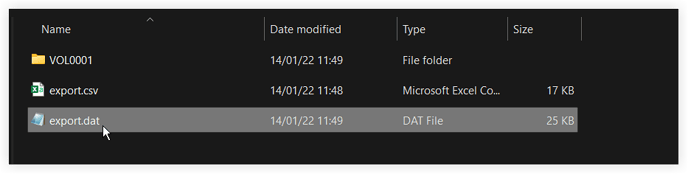
- Your production will also include audio files, videos, corrupt files, and unsearchable documents here.
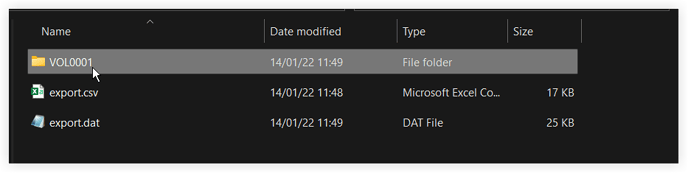
- Lastly, here is a set of your documents as either native or PDF files. The document file formats here depend on the export settings you selected above.
Document Review - Export a Production - Gen 3
- Right-click a folder containing the files you would like to export. Select Export and then Export for Production.
- This is the Export for Production screen. The folder you are exporting will be displayed here.

Which columns would you like to include in the index?
- Next, add some column headers to your production. The column headers you select will determine what data is shown in your production. You can export more columns by clicking Add another column. You can view all possible column headers here.
- You can rename the column in your production by entering a value in the field below. If you leave an entry blank, the default column name will be used.
We have created a sample set of column headers below.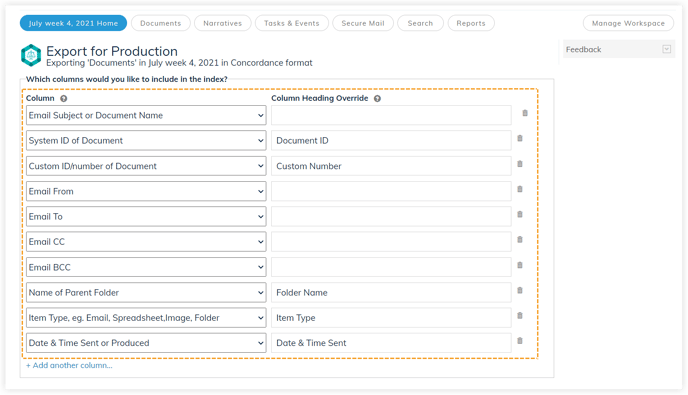
In which format would you like to export the documents?
- Select which format you would like to export your files. Emails, spreadsheets and other workspace documents have five export options. Encrypted documents can only be exported as native. It is advisable to select a document format with a fallback option. If there is no fallback option, some of your documents may not end up in your concordance export.
Emails, Spreadsheets, Other documents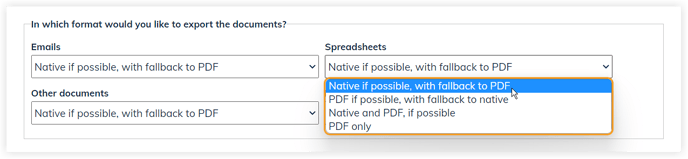
Native, if possible, with a fallback to PDF - The system will export your files in the format they were uploaded. If the system cannot export your files in their original format, they will be exported as PDFs.
PDF, if possible, with fallback to native - The system will export your files as PDF documents. If the system cannot export your files as PDFs, your files will be exported in the format in which they were uploaded
Native and PDF, if possible - The system will export both the files in their uploaded format and a PDF version of your workspace files.
Native only - The system will export your file in its original format or the format it uploaded.
PDF only - The system will export your files as PDF documents.
Note: If you select PDF only, documents (eg. mpv, video, password protected, etc) that could not be exported as pdf will not be included.
Export Options
- Tick Apply redactions to export redacted documents in your production. Documents with redactions and watermarks will be converted to pdf.
Note: Documents which include redactions will always be exported as a PDF. - Select any documents you do not want to export but do want to include in the index.
Note: If you have the same exact documents under a different sub-folder, only one copy of the document will be included. - Next, select system behaviour when exporting a document or email with attachments. Click here for detailed information on how the attachments are handled during the production export.
- Only export attachments that explicitly match your selection (eg. tag) - Only export attachments you have selected and marked.
- Export all of your attachments - Export all email attachments.
- Lastly, click Export.
Production
- The system will build your report. When it is finished, tick Download the report to download a copy to your computer, or Save the report into the room and select which folder you would like a copy to be saved. Next, click Download Report.
- Voila! Here is your production. Click on the. CSV file to view your column headers and corresponding data.
* .CSV File - Your production will also include audio files, videos, corrupt files, and unsearchable documents here.
- Lastly, here is a set of your documents as either native or PDF files. The document file formats here depend on the export settings you selected above.