Workspace Admins can control which users can rename, delete, view, print, download, upload and view watermarks on documents.
These permissions can be customised for individual users or groups.
How To Set Folder Permissions - Gen 4
How To Set Folder Permissions - Gen 3
How To Set Folder Permissions - Gen 4
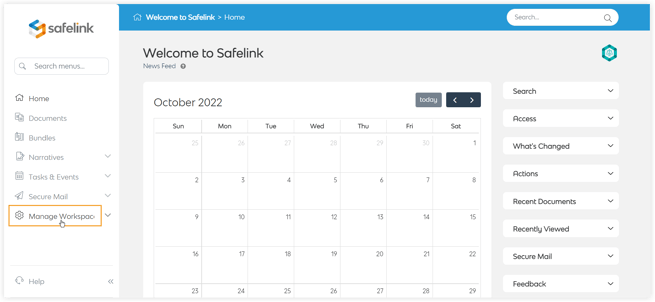
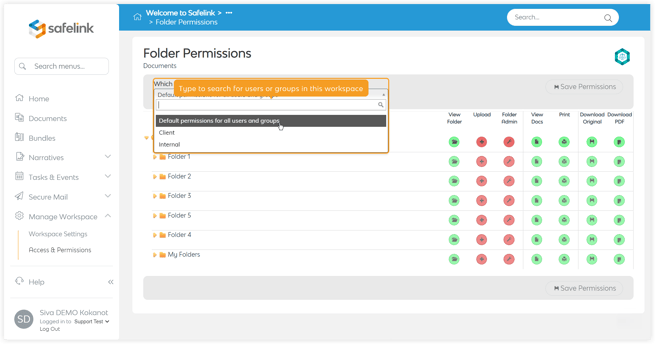
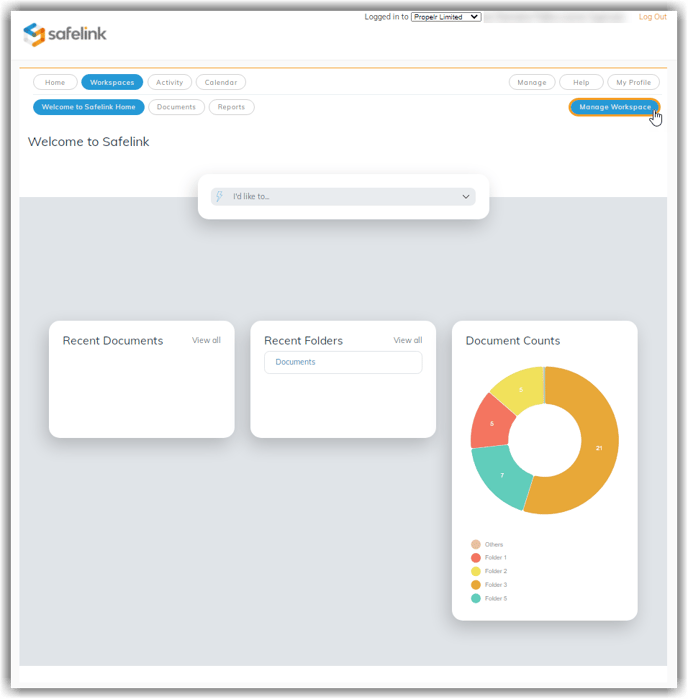
- To edit your folder permissions, click Manage Workspace.
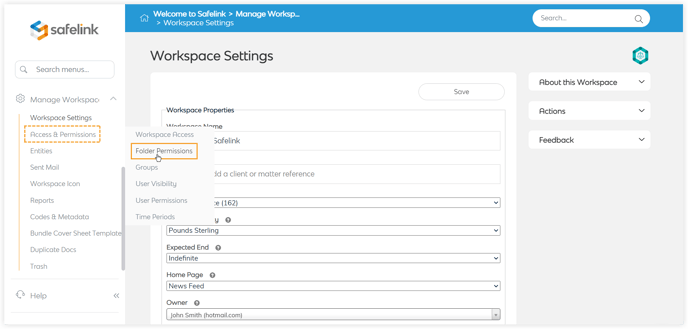
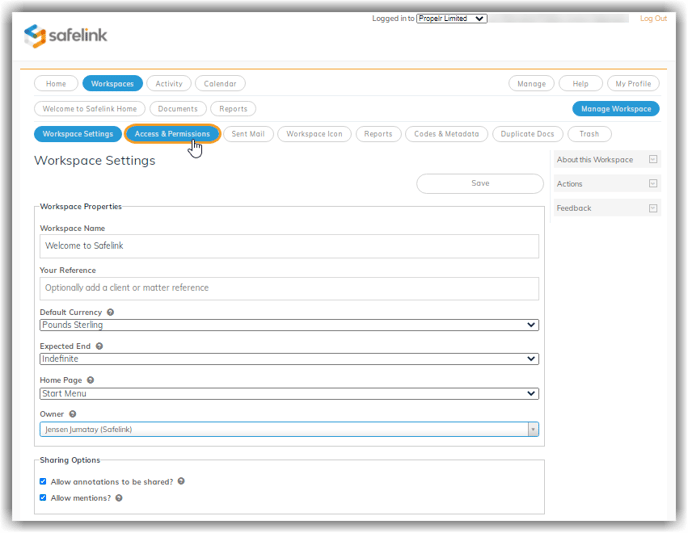
- From Access and Permissions, click Folder permissions.
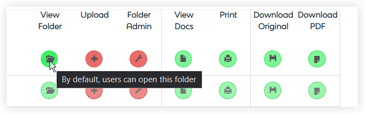
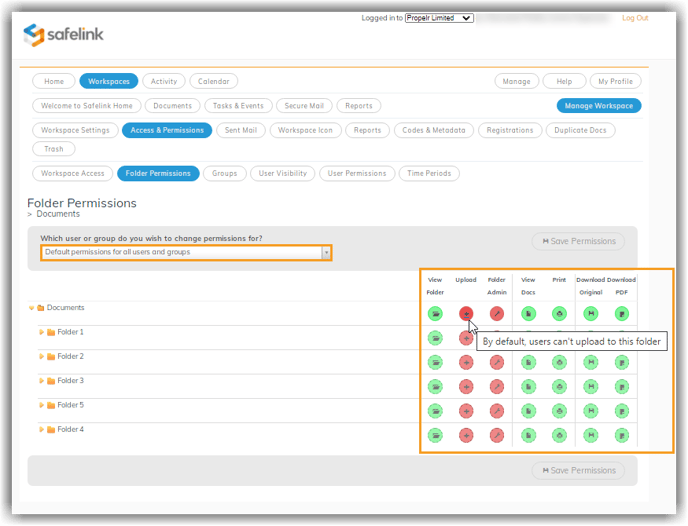
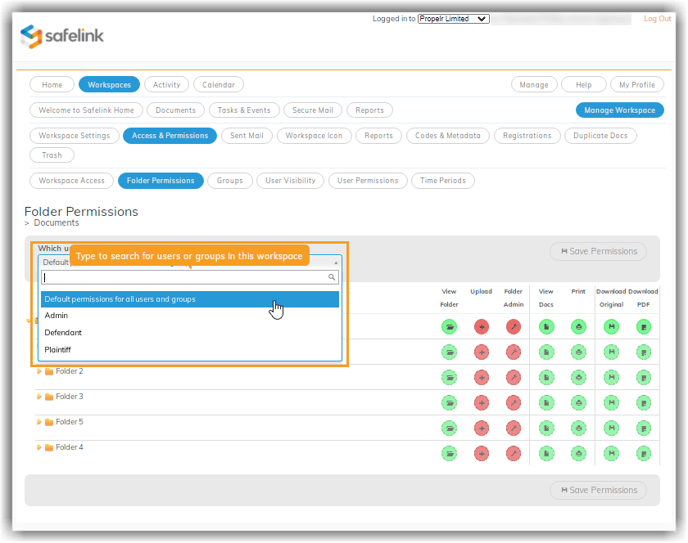
- On the folder permissions screen, you can edit permissions for individual users and groups within this workspace. This first set of buttons represents the Default Permissions for all Users and Groups.
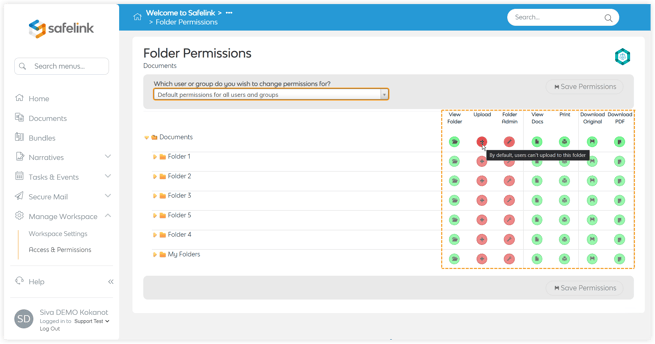
Green buttons represent a permission or action a default user has or can perform.
Red buttons represent a permission or action a default user does not have or cannot perform.
Note: If you hover your cursor over a button, Safelink will prompt a message to inform you what Default users can or cannot do.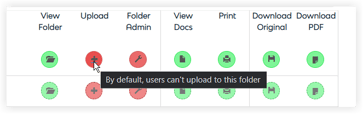
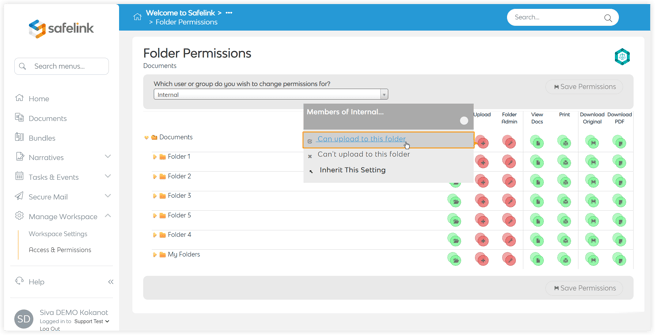
- You can set folder permissions for a specific group by clicking the drop-down menu, then select which group’s permissions you’d like to change.
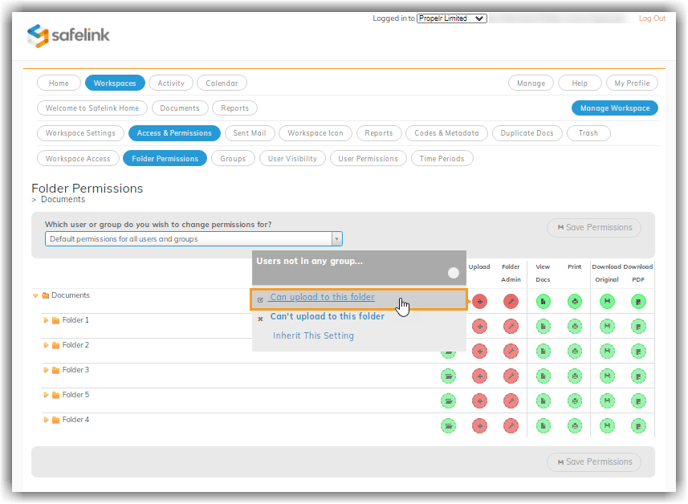
- The second set of buttons is now visible over the first set. Click on a button in this second set to change folder permissions for the group you’ve just selected.
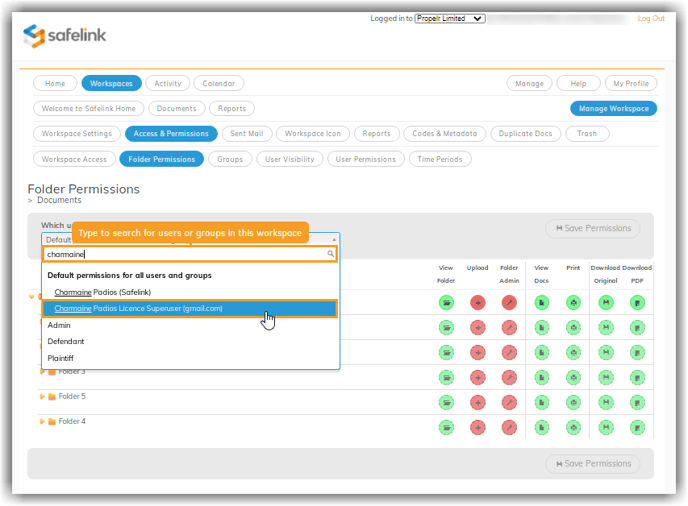
- You can set specific folder permissions for an individual user by clicking the drop-down menu, typing in this user’s name, and then selecting this user from the list below.
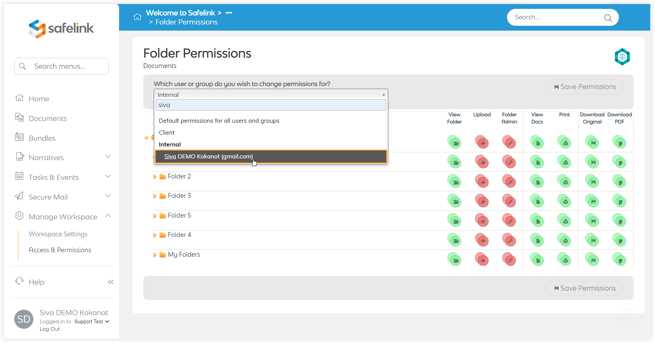
If at any time you are not certain which permissions you are changing, you can hover over a button to prompt a message from the system. This is a hierarchical system; the individual user permission will override the group and the default permission setting.
How To Set Folder Permissions - Gen 3
- To edit your folder permissions, click Manage Workspace.
- Next, click Access and Permissions.
- Next, click Folder Permissions.
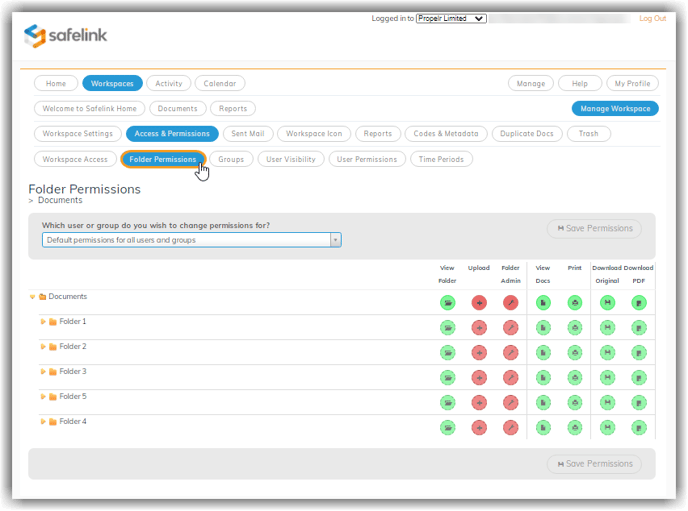
- On the folder permissions screen, you can edit permissions for individual users and groups within this workspace. This first set of buttons, represents the Default Permissions for all Users and Groups.
Green buttons represent a permission or action a default user has or can perform.
Red buttons represent a permission or action a default user does not have or cannot perform.
Note: If you hover your cursor over a button, Safelink will prompt a message to inform you what Default users can or cannot do.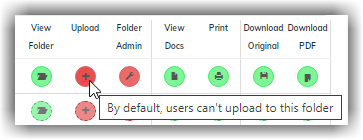

- You can set folder permissions for a specific group by clicking the drop-down menu, then select which group’s permissions you’d like to change.
- The second set of buttons is now visible over the first set. Click on a button in this second set to change folder permissions for the group you’ve just selected.
- You can set specific folder permissions for an individual user by clicking the drop-down menu, typing in this user’s name, and then selecting this user from the list below.
If at any time you are not certain which permissions you are changing, you can hover over a button to prompt a message from the system. This is a hierarchical system; the individual user permission will override the group and the default permission setting.