How to Create a Workspace - Gen 4
How to Create a Workspace - Gen 3
-
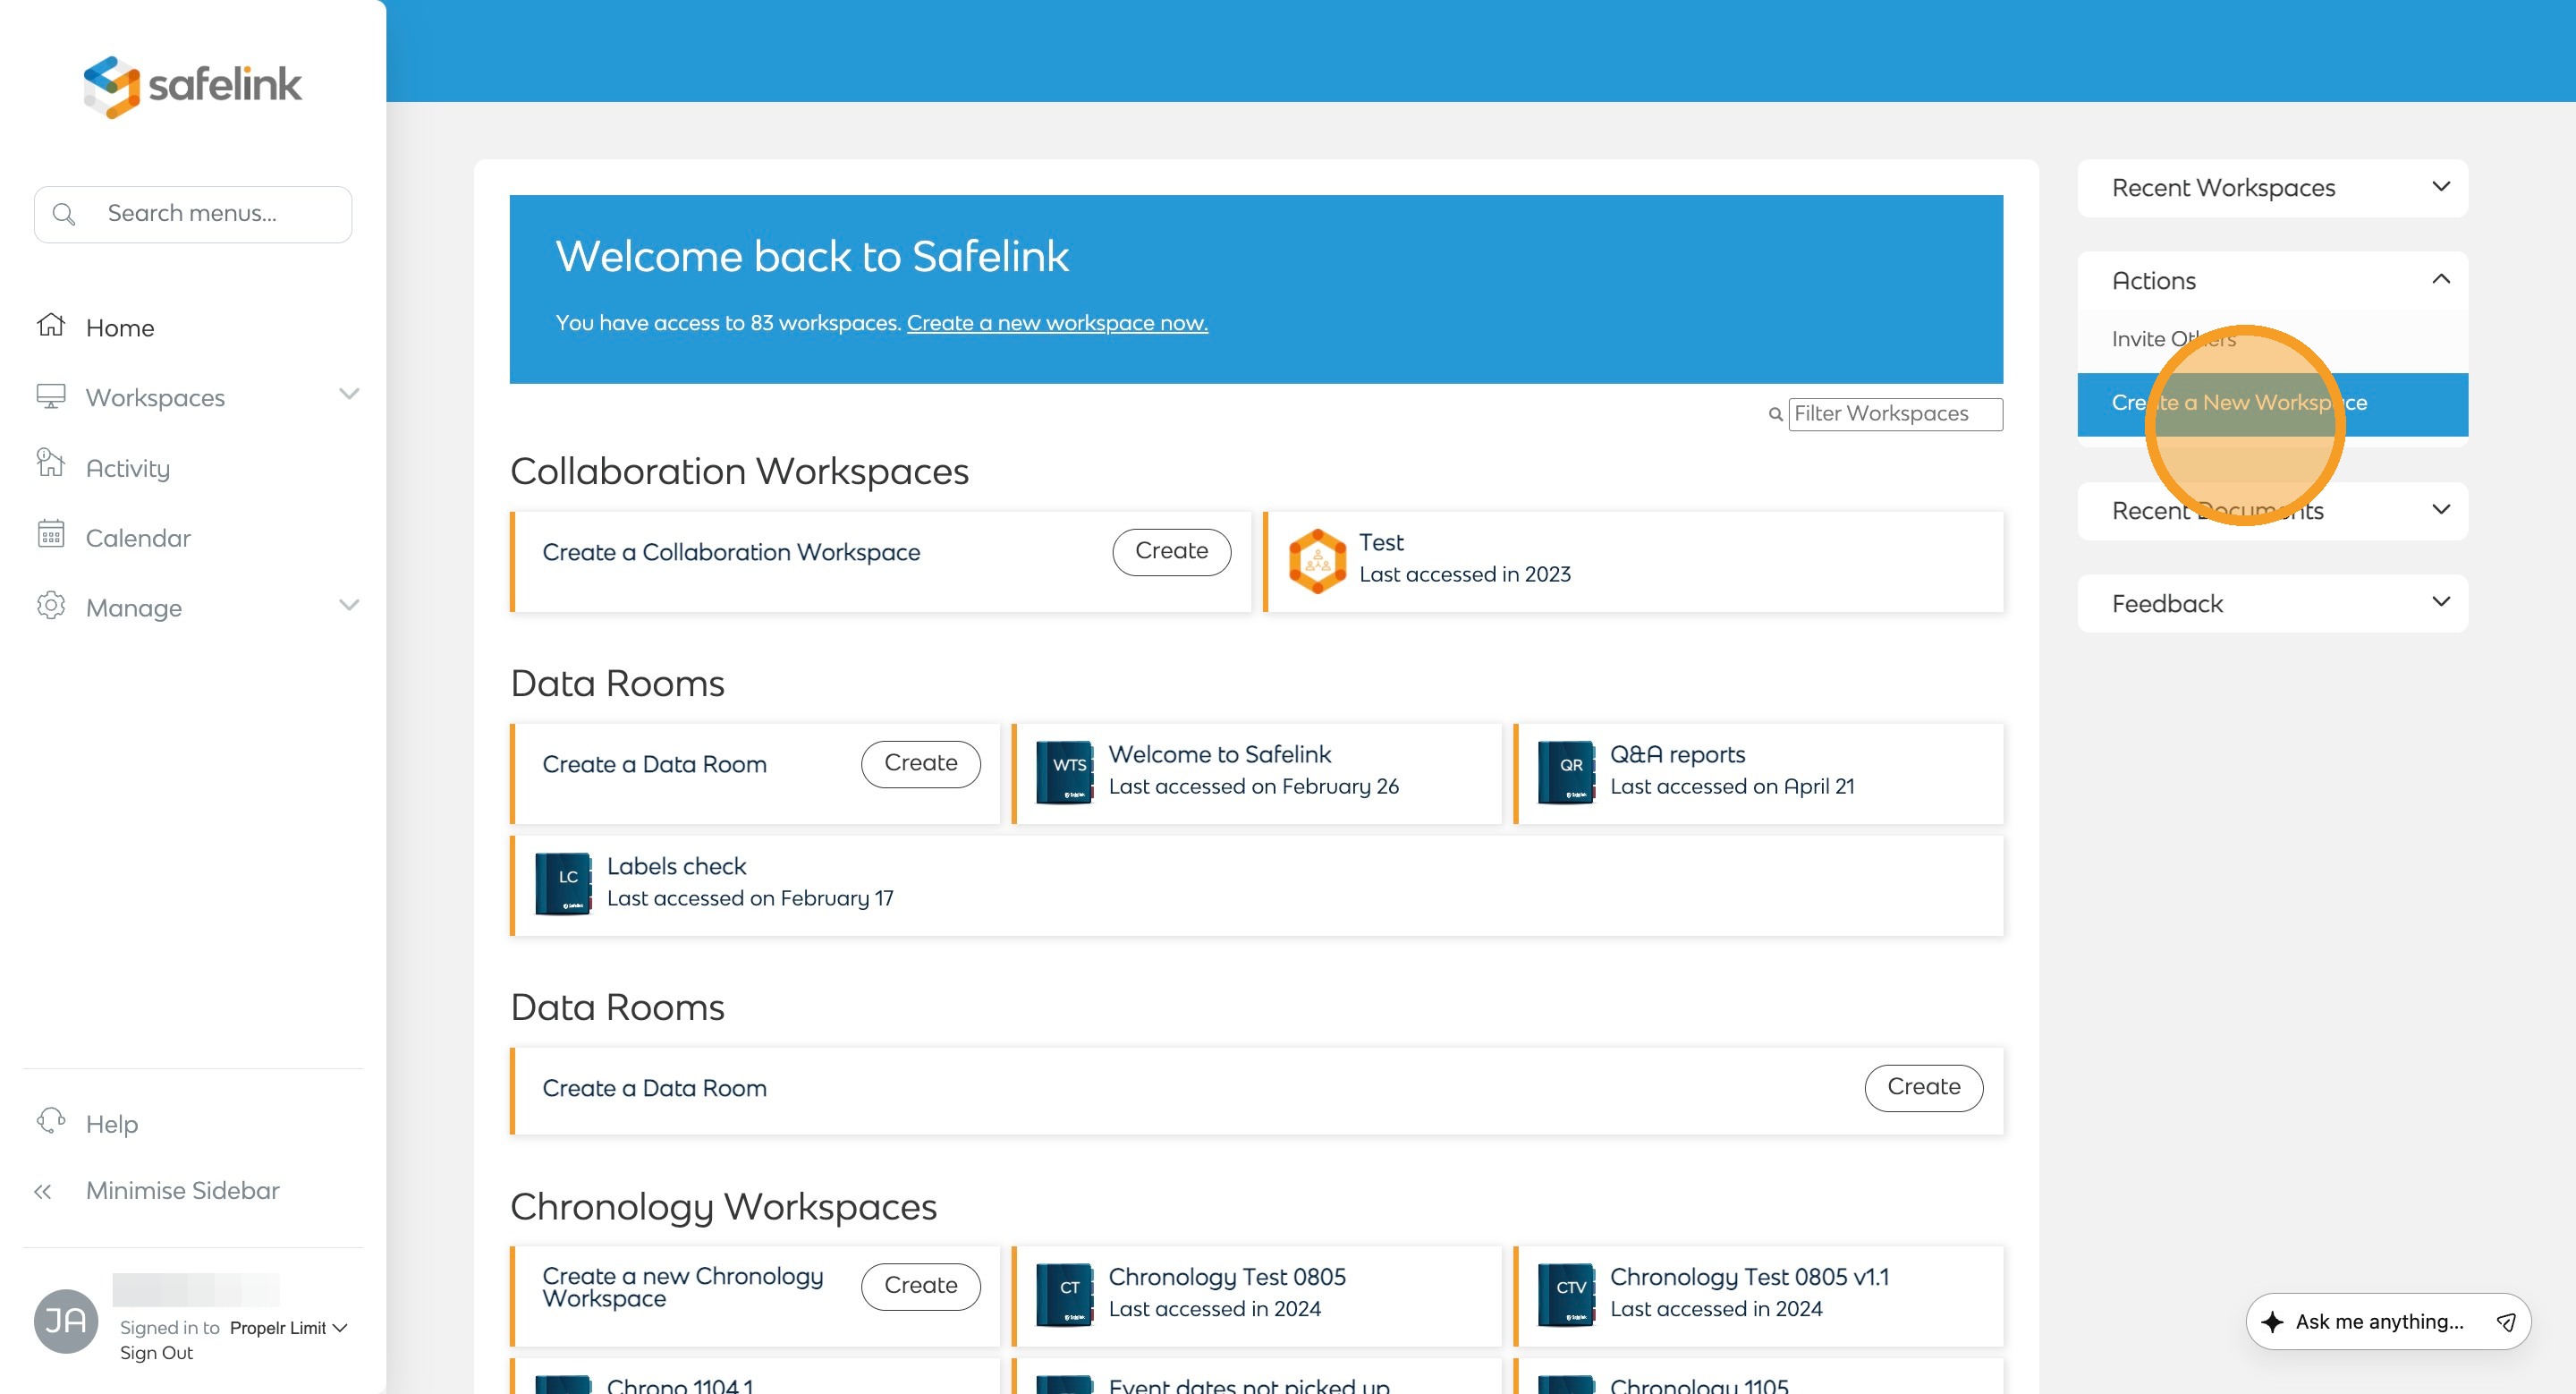
To begin, click Create a New Workspace on the actions menu to the right.
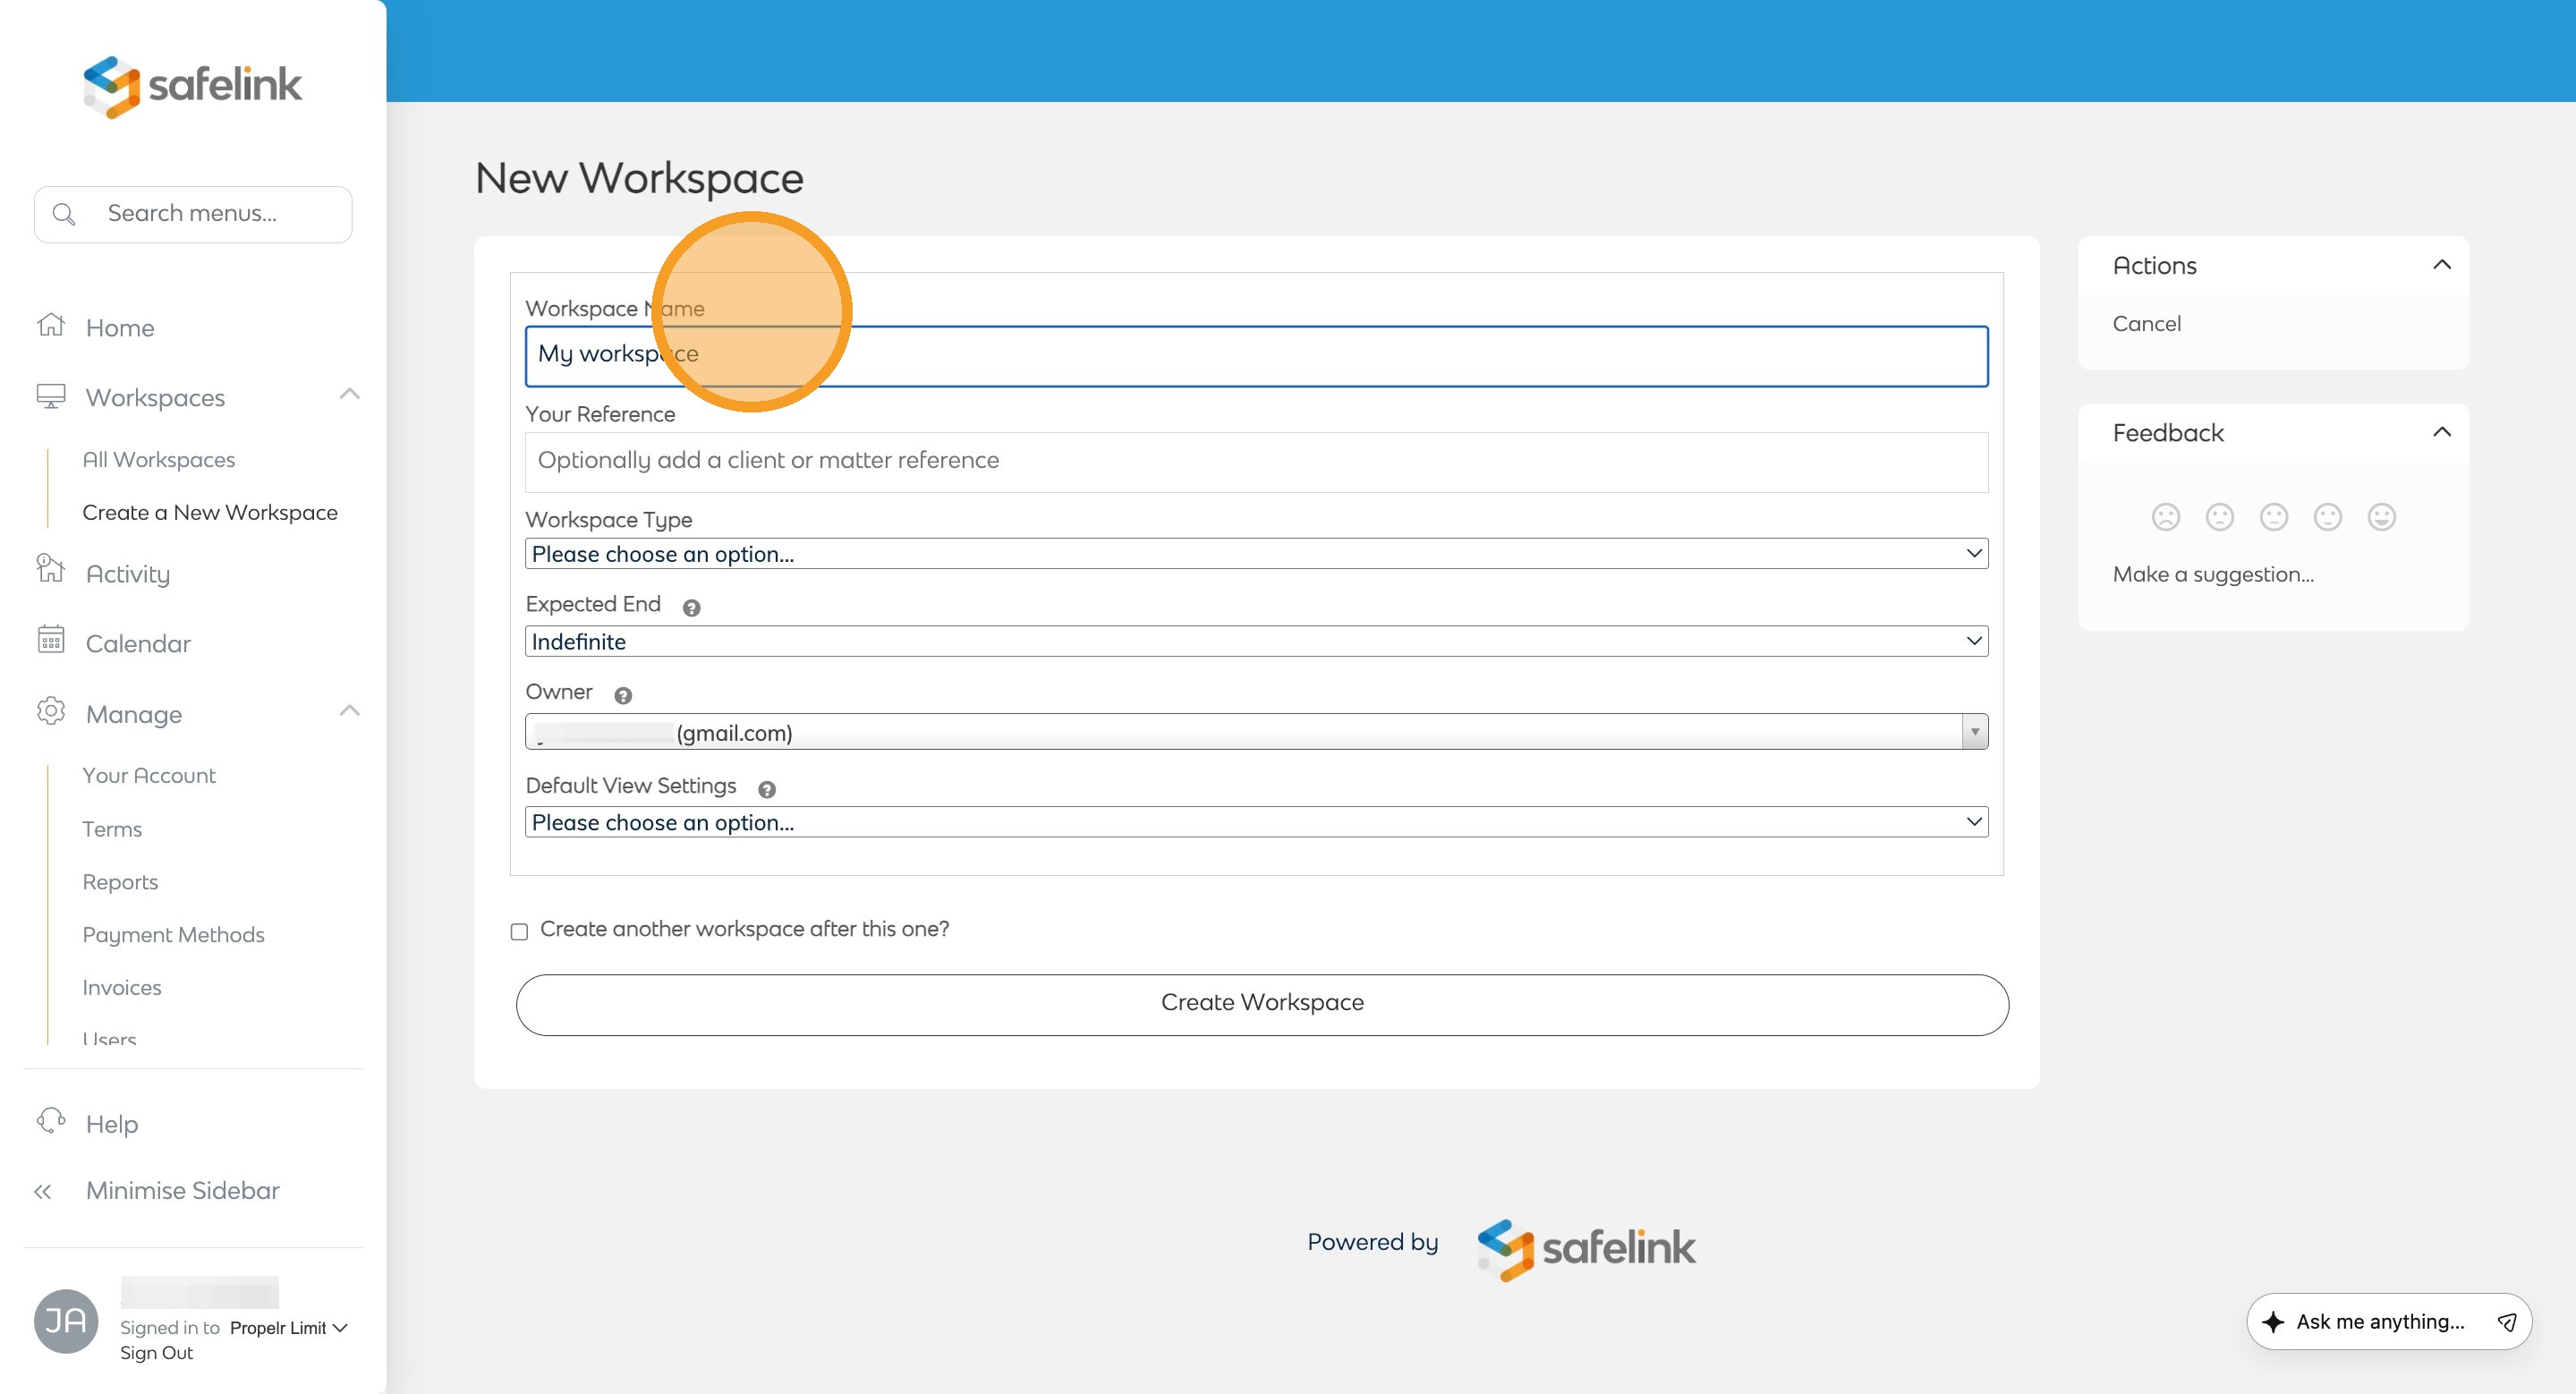
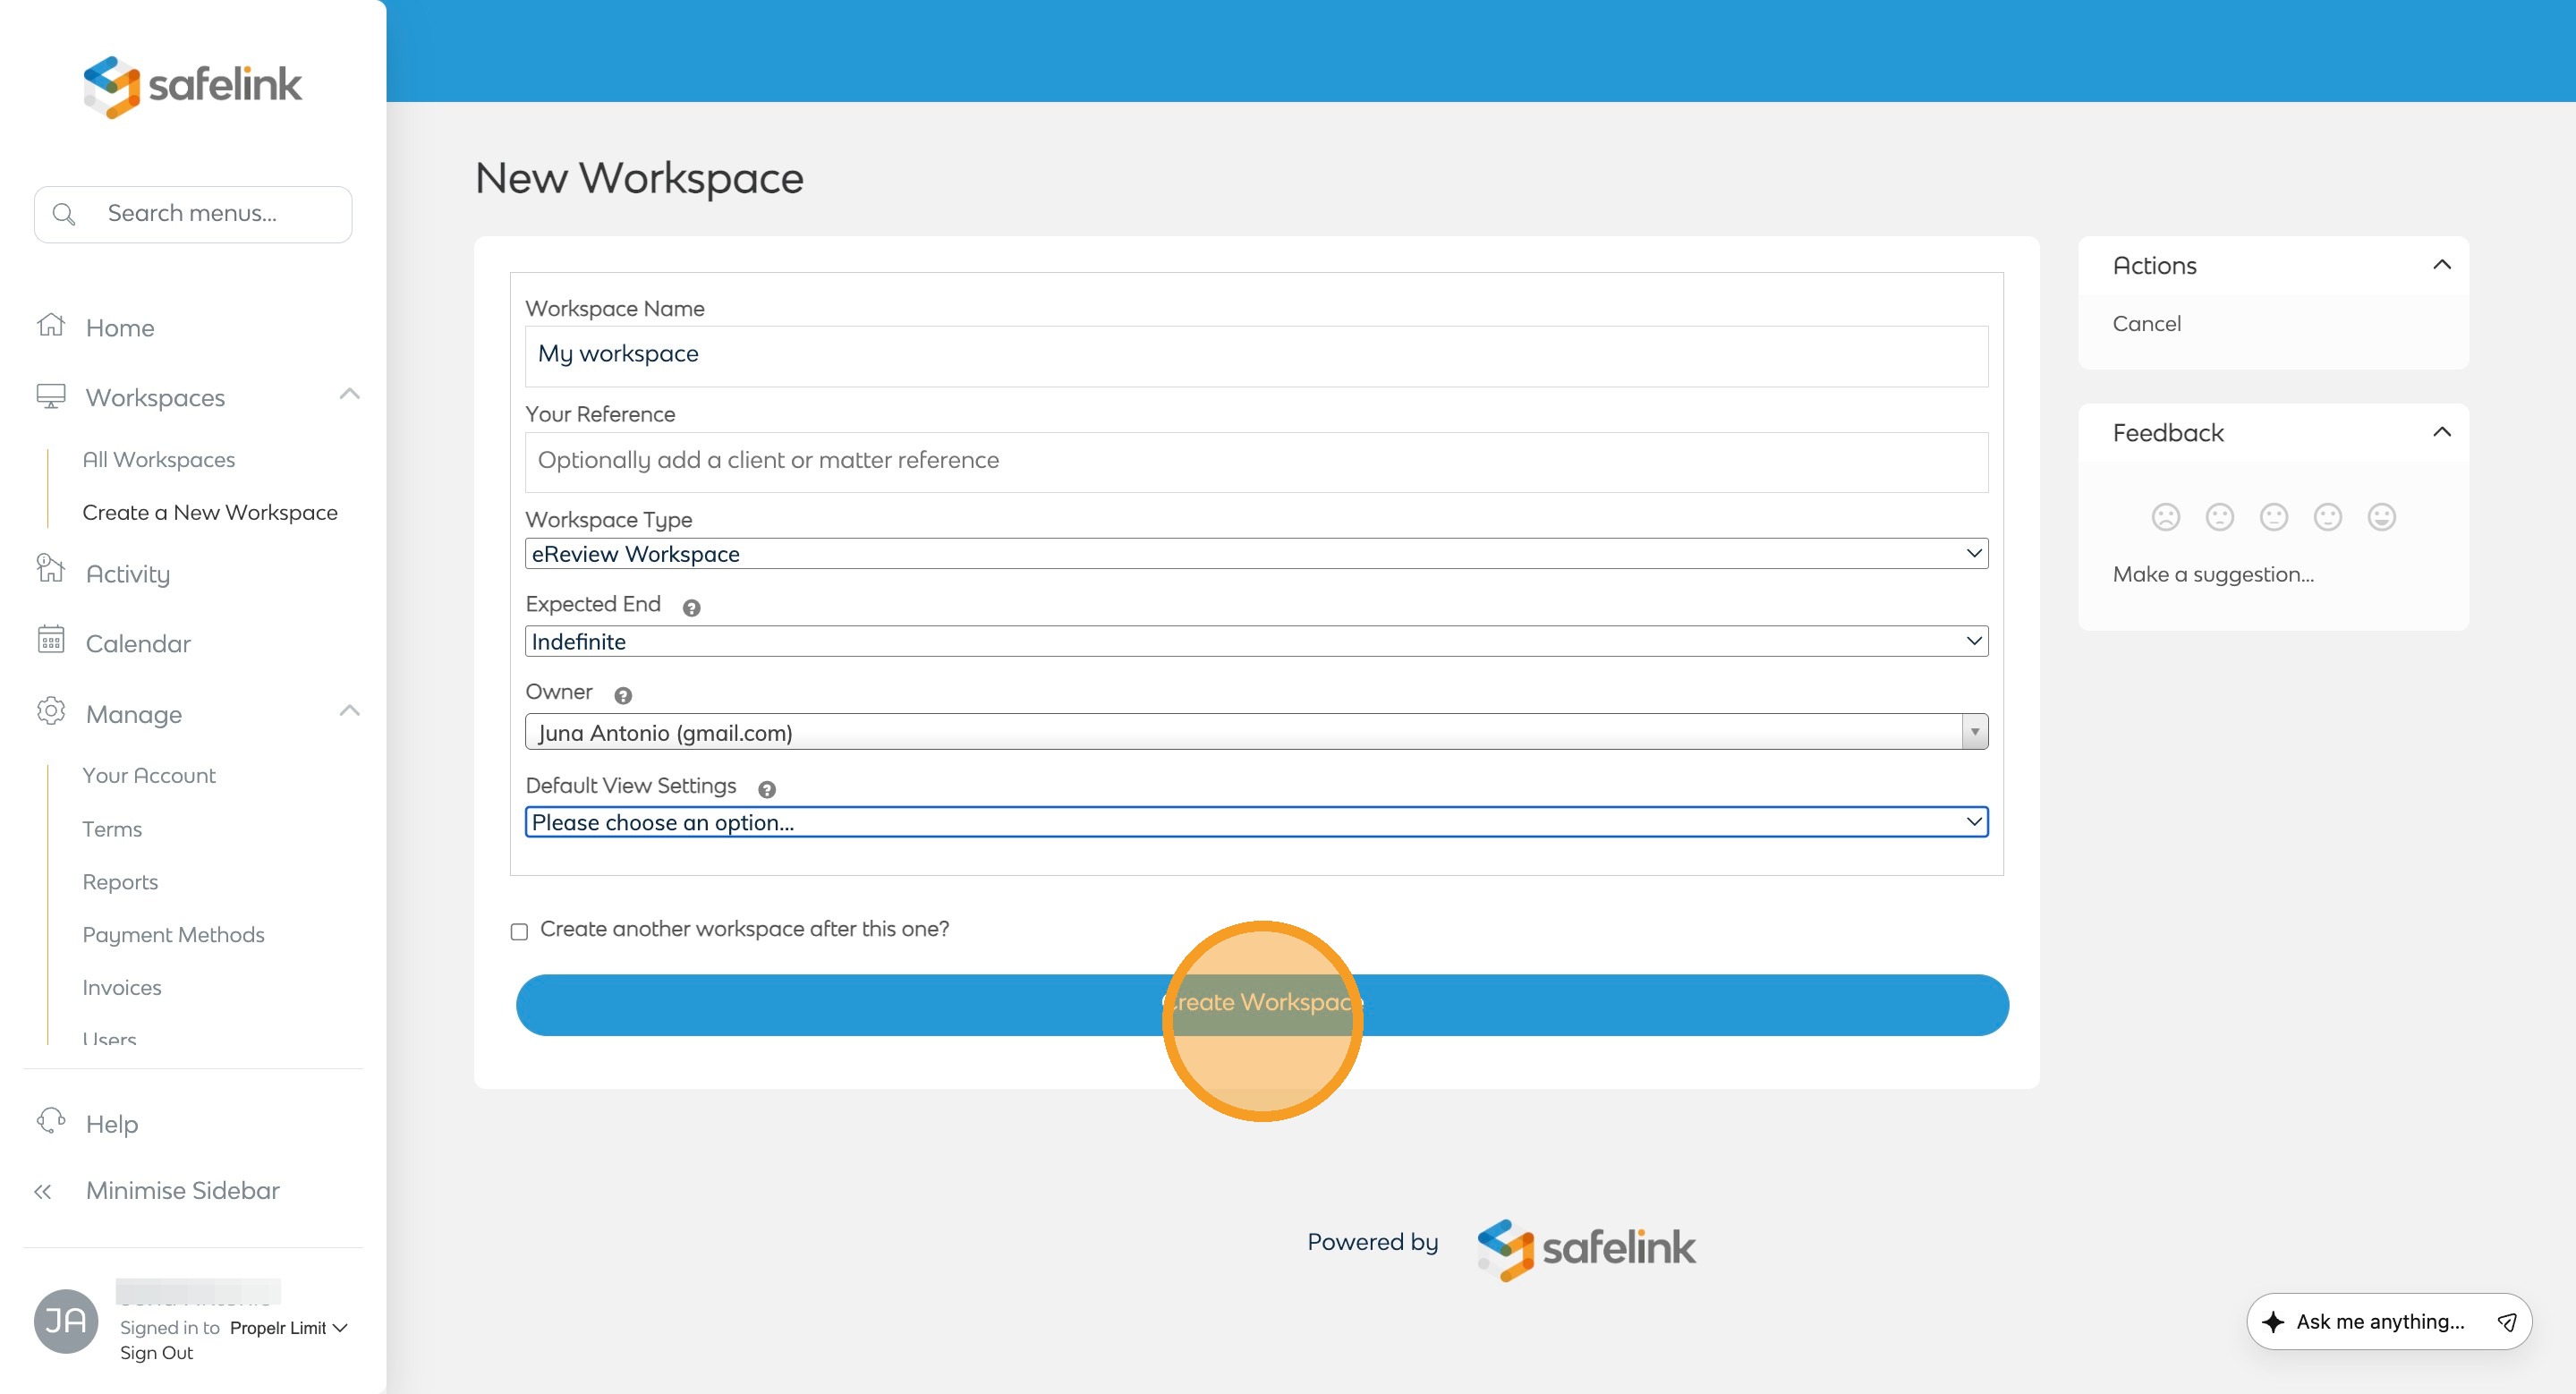
- Next, give your Workspace a name. You can optionally add a client name or reference number.
- Next, pick a workspace type. Each Workspace has apps and custom tools to help you accomplish your project goals. These apps can be enabled or disabled to personalise the behaviour of your Workspace. For more information regarding Workspace types, click here.
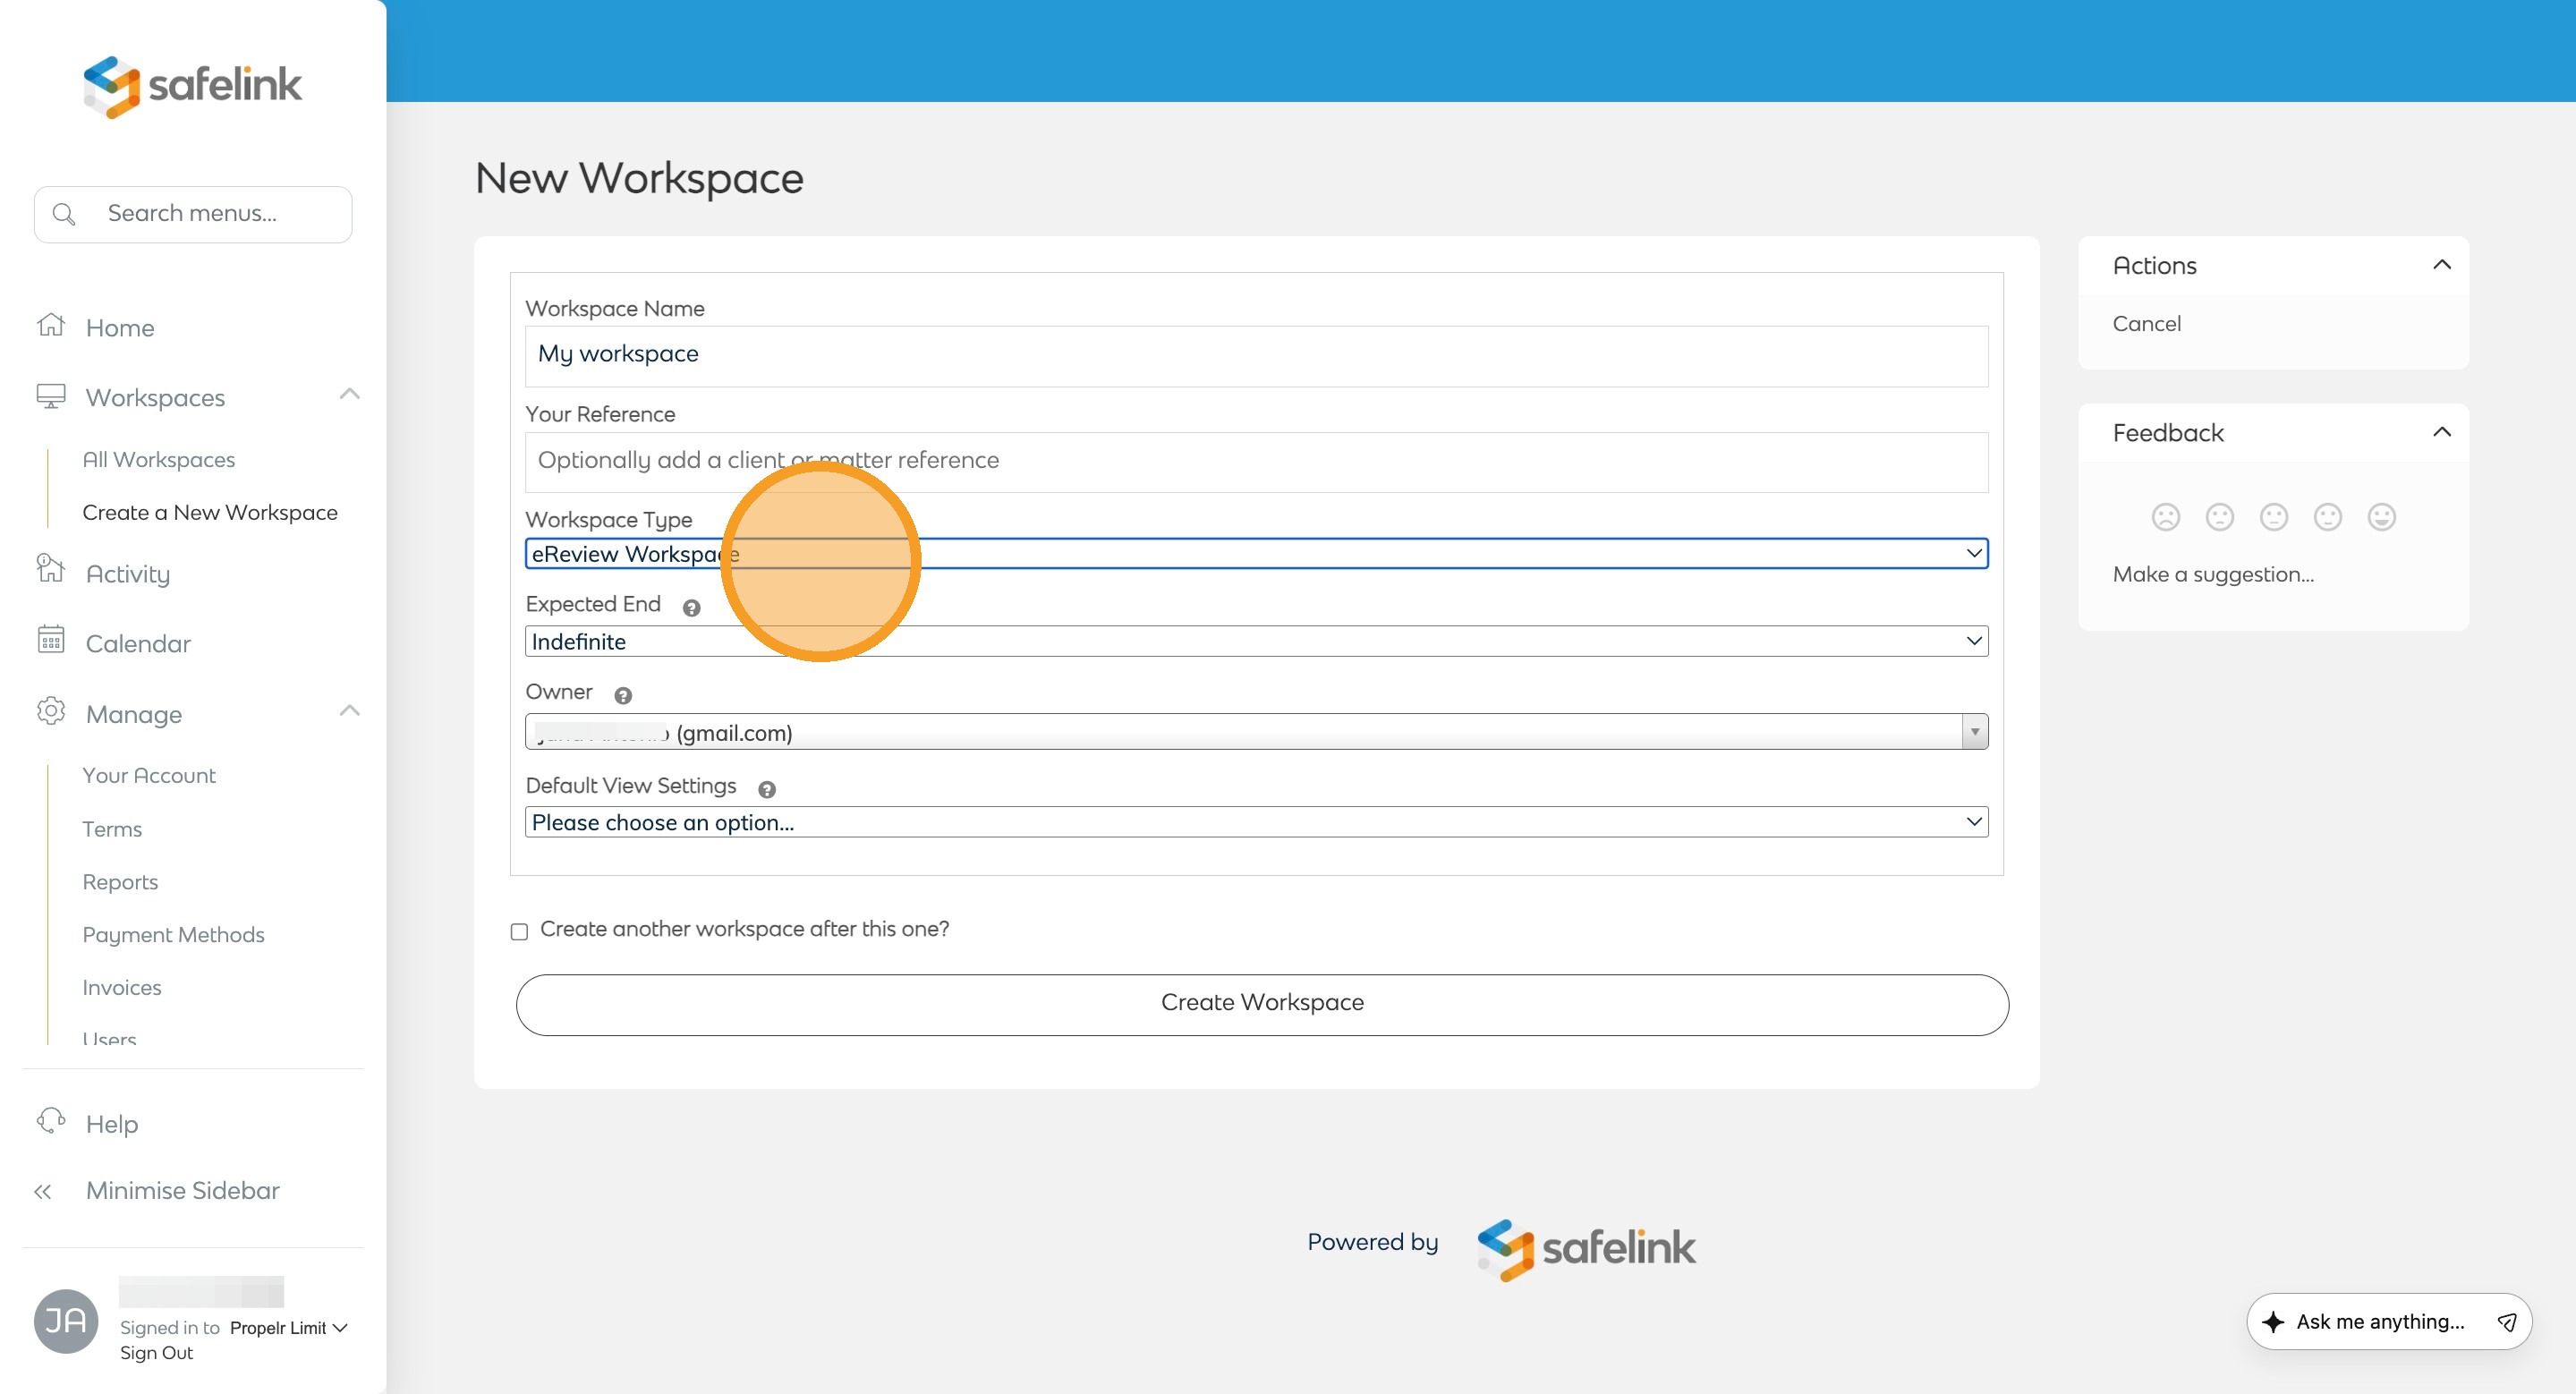
- Pick an end date. You can select an end date if you know when you will likely finish this Workspace. This will be shown in your workspace listing to help you manage your workspaces.

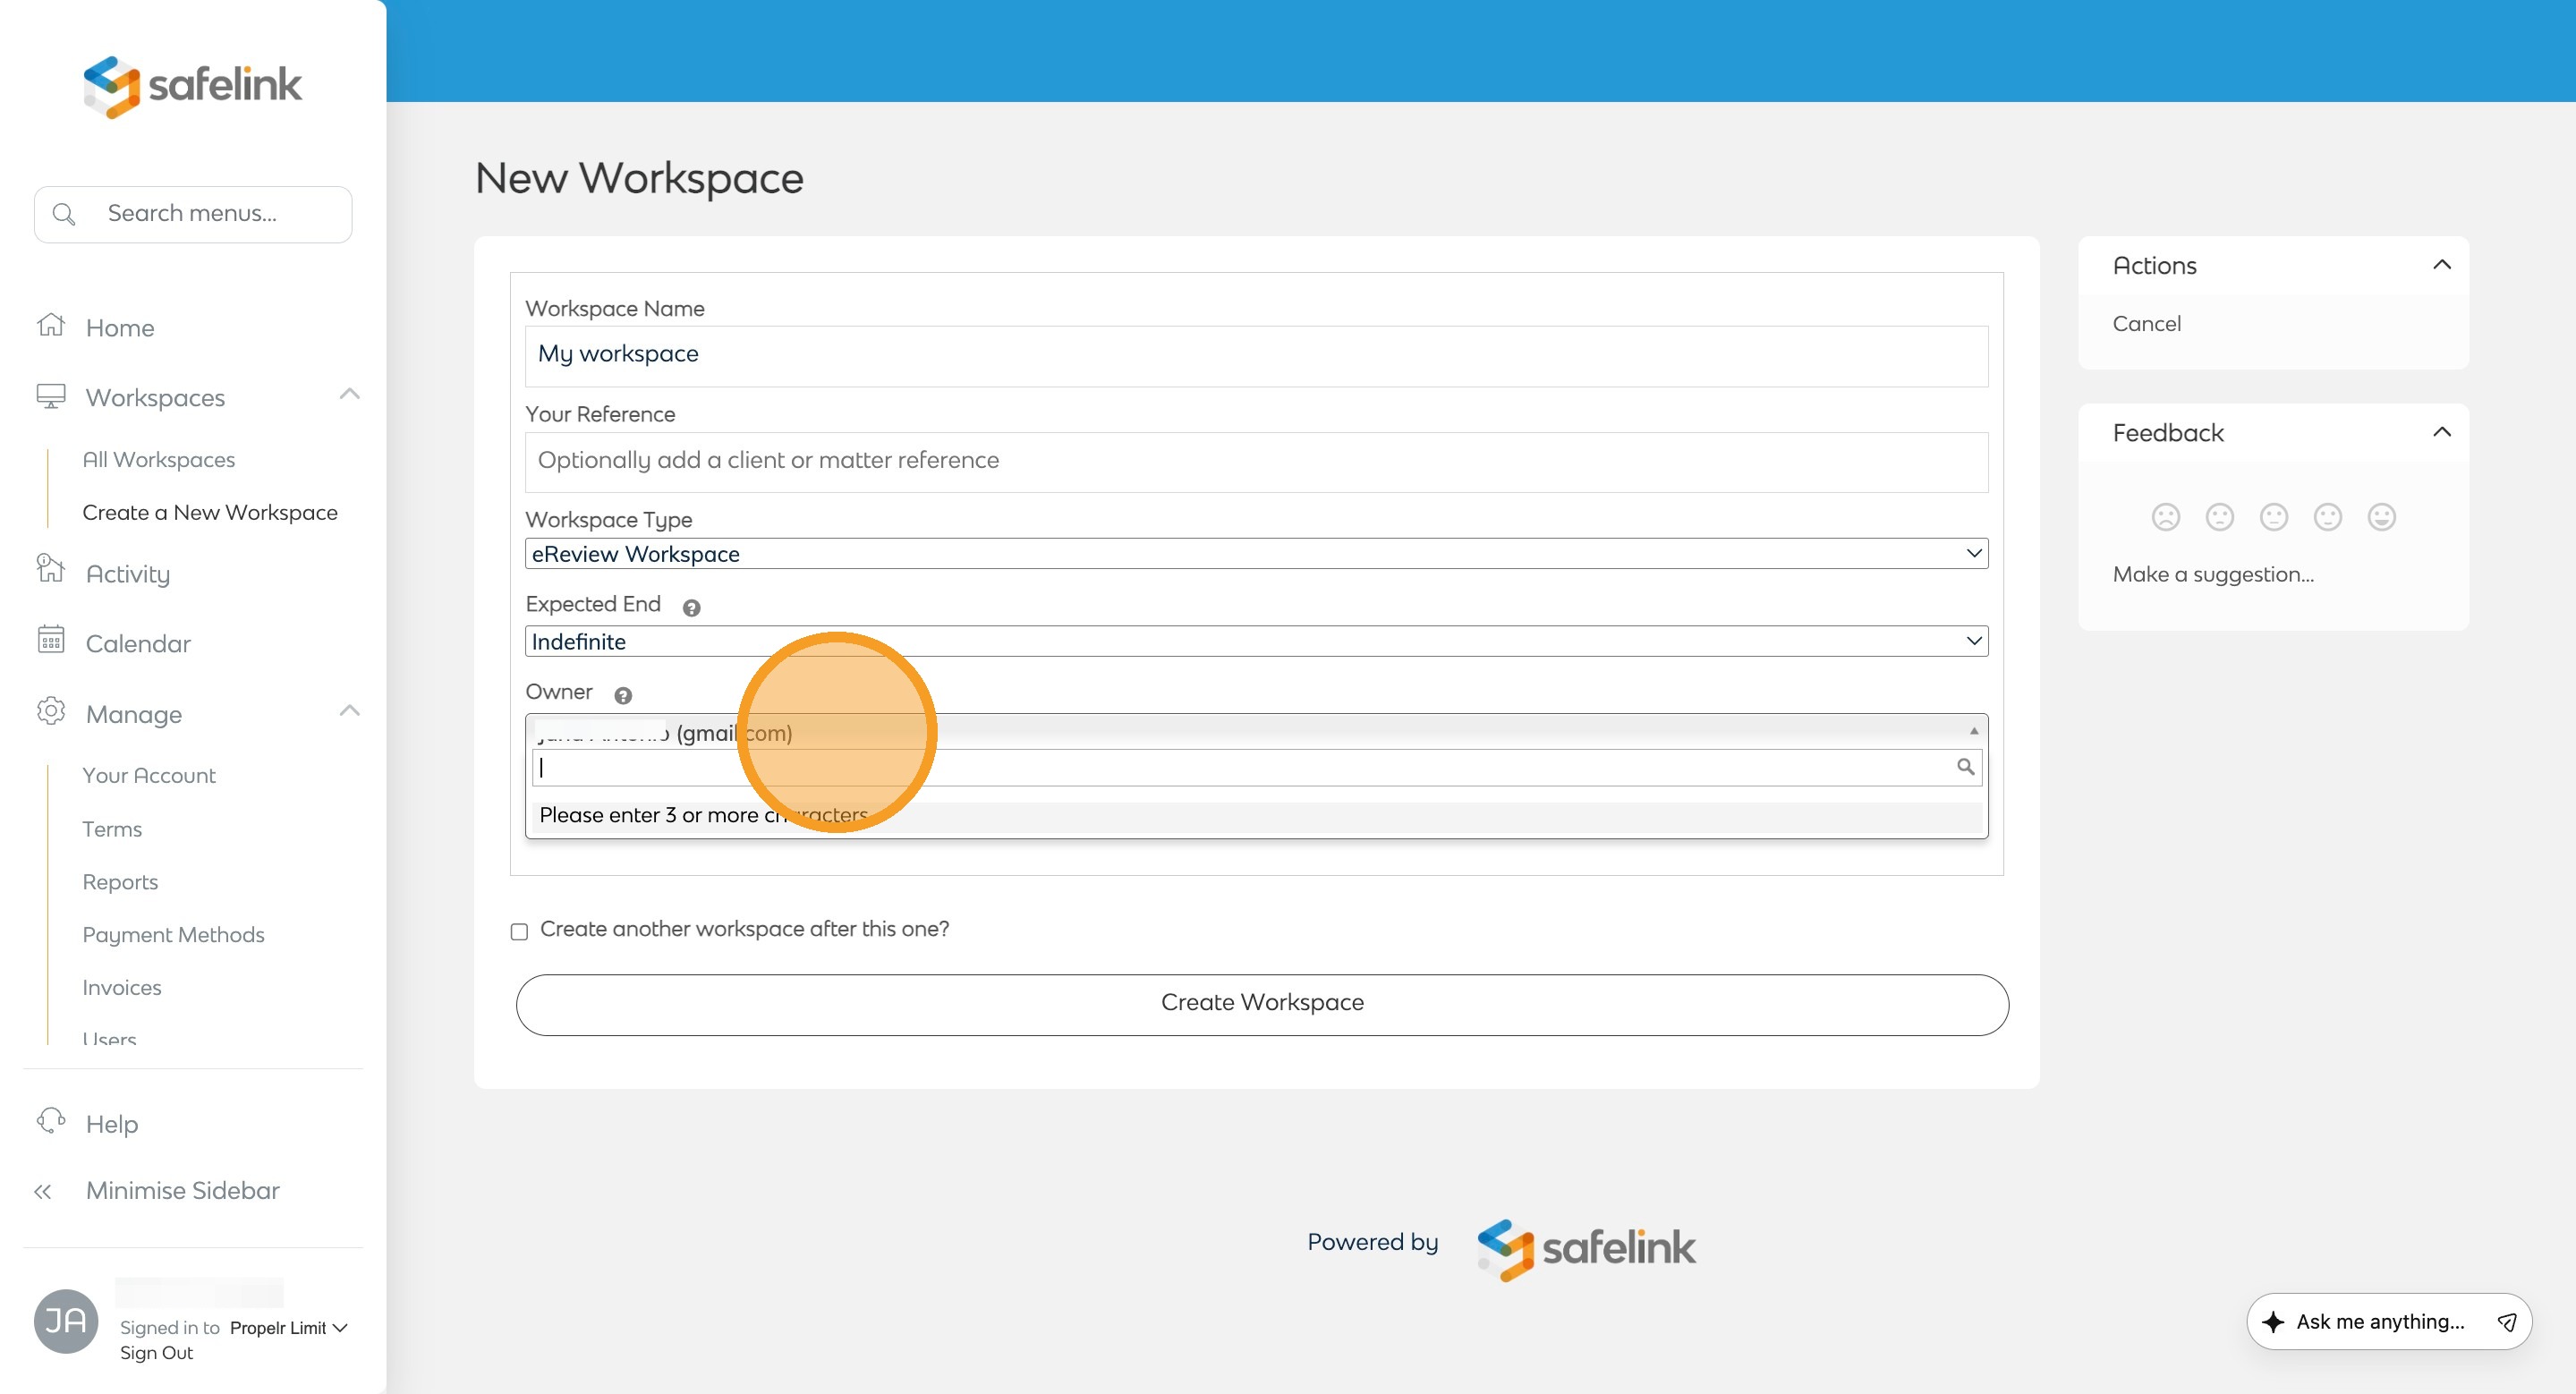
Note: This will not automatically delete or remove your Workspace. - You can optionally nominate somebody as the owner of this Workspace. This is for referencing and reporting so that Safelink Support knows who is responsible for the Workspace if any queries are raised.
- You can optionally copy the view settings from another workspace into this new workspace.

- Lastly, click Create Workspace to create your new Workspace.
How to Create a Workspace - Gen 3
- To begin, click Create a New Workspace on the actions menu to the right.

- Next, give your workspace a name. You can optionally add a client name or reference number.

- Next, pick a workspace type. Each workspace has apps and custom tools to help you accomplish your project goals. These apps can be enabled or disabled to personalise the behaviour of your workspace. For more information regarding workspace and types, click here.

- Pick an end date. You can select an end date if you know when you are likely to be finished with this workspace. This will be shown in your workspace listing to help you manage your workspaces.

Note: This will not automatically delete or remove your workspace. - You can optionally nominate somebody as the owner of this workspace. This is for referencing and reporting so that Safelink Support knows who is responsible for the workspace if any queries are raised.

- Lastly, click Create Workspace to create your new workspace.
