How to Build a Court Bundle - The Basics ( Gen 4)
How to Build a Court Bundle - The Basics ( Gen 3)
How to Build a Court Bundle - The Basics ( Gen 4)
Create sections, upload PDF documents then arrange and order your documents. You can annotate and redact document sections. You can create a custom cover sheet, apply customised labels and numbering, view your Bundle as a Virtual Binder, and export it as a PDF when it is ready.
Create a Bundle
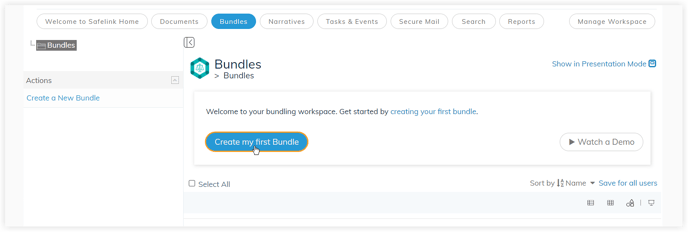
- Click Create a New Bundle.
.png?width=655&height=192&name=How%20to%20Build%20a%20Court%20Bundle%20-%20The%20Basics%20(1).png)
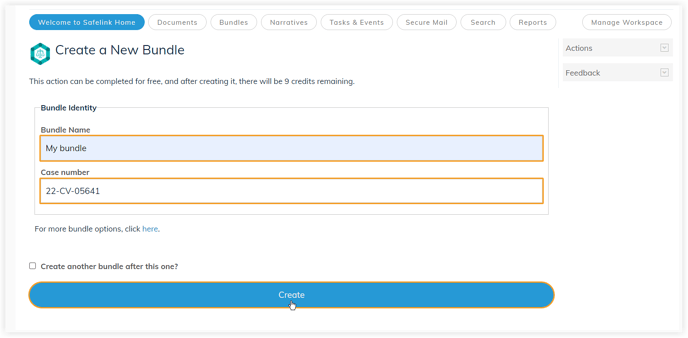
- Give your Bundle a name, add your case number, and click Create.
.png?width=655&height=259&name=How%20to%20Build%20a%20Court%20Bundle%20-%20The%20Basics%20(2).png)
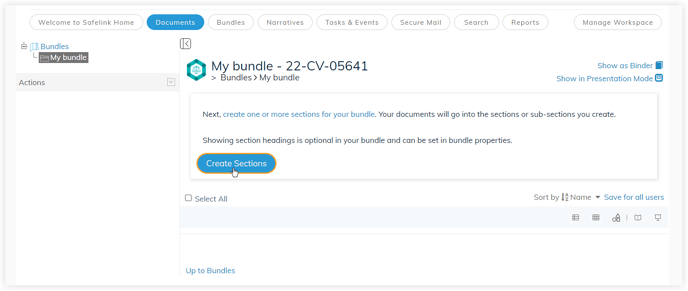
Create Sections
- Click Create Sections. You need to create a section before adding documents to your Bundle.
.png?width=655&height=237&name=How%20to%20Build%20a%20Court%20Bundle%20-%20The%20Basics%20(3).png)
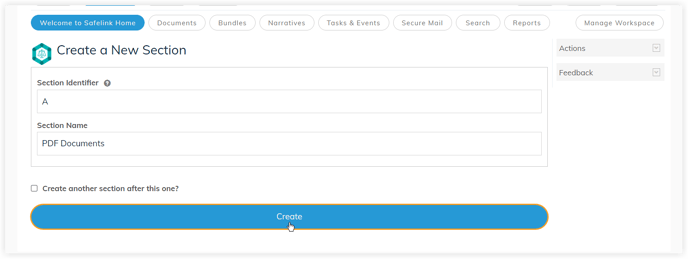
- Enter a section identifier and give your section a name. You can tick Create another section after this one? to add additional sections. Click Create.
.png?width=655&height=228&name=How%20to%20Build%20a%20Court%20Bundle%20-%20The%20Basics%20(4).png)
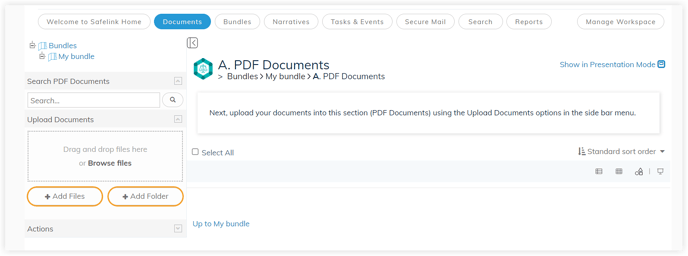
Upload PDF Files
- Click Upload Documents
.png?width=655&height=230&name=How%20to%20Build%20a%20Court%20Bundle%20-%20The%20Basics%20(5).png)
-
An Upload Modal will appear. Click Add Files to add individual documents or Add
Folders to add entire folders to your workspace..png?width=655&height=229&name=How%20to%20Build%20a%20Court%20Bundle%20-%20The%20Basics%20(6).png)
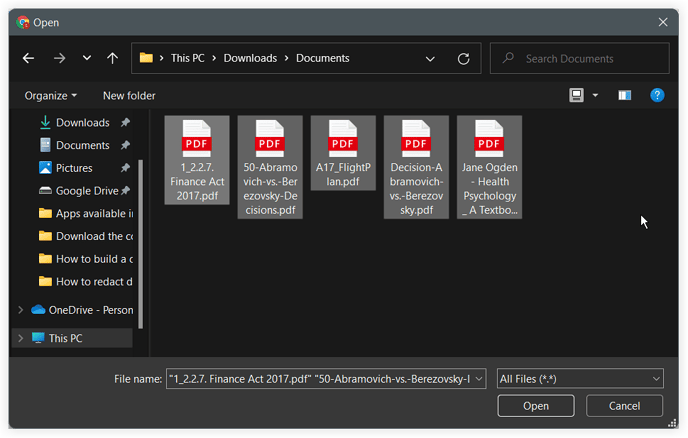
7. Select the file(s) or folder(s) you would like to upload and click Open. .png?width=647&height=376&name=How%20to%20Build%20a%20Court%20Bundle%20-%20The%20Basics%20(7).png)
8. The files selected will show in the Upload Modal. Then you can click the Upload button..png?width=647&height=633&name=How%20to%20Build%20a%20Court%20Bundle%20-%20The%20Basics%20(8).png)
9. An Indicator bar will show the progress of the file(s) or folder(s) being uploaded.
.png?width=688&height=570&name=How%20to%20Build%20a%20Court%20Bundle%20-%20The%20Basics%20(9).png)
10. When you need to upload more file(s) or folder(s) you can click the Upload More Files button. If not then you can click the X.
.png?width=606&height=374&name=How%20to%20Build%20a%20Court%20Bundle%20-%20The%20Basics%20(10).png)
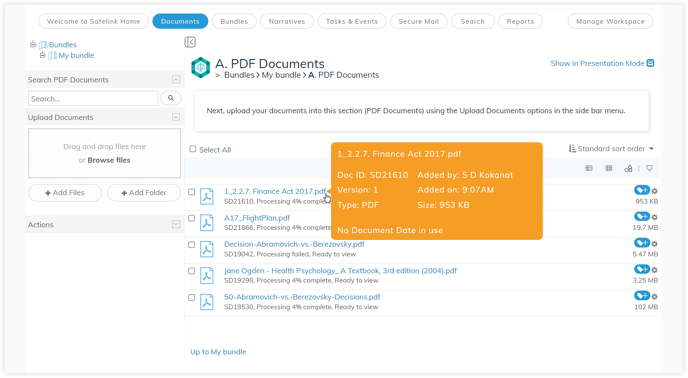
11. When your files have finished uploading, click on a document to open it.
-2.png?width=688&height=382&name=How%20to%20Build%20a%20Court%20Bundle%20-%20The%20Basics%20(11)-2.png)
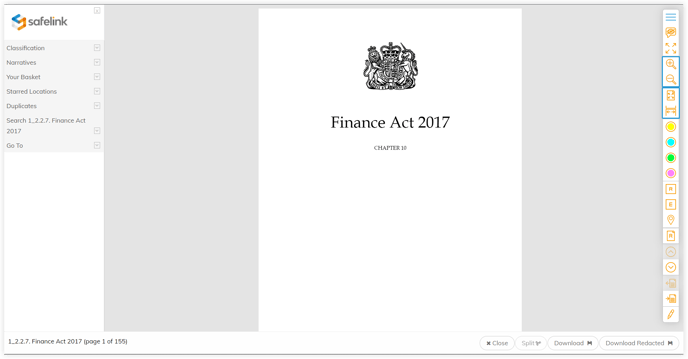
12. Use your cursor to scroll through the document in Document View. You can use the options on the right to zoom in / zoom out, view an entire page or view the document page width. .png?width=655&height=373&name=How%20to%20Build%20a%20Court%20Bundle%20-%20The%20Basics%20(12).png)
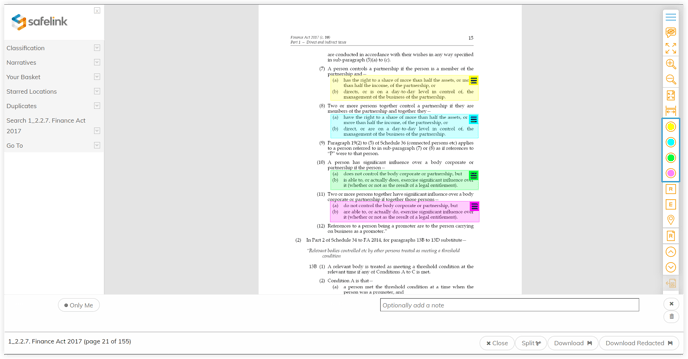
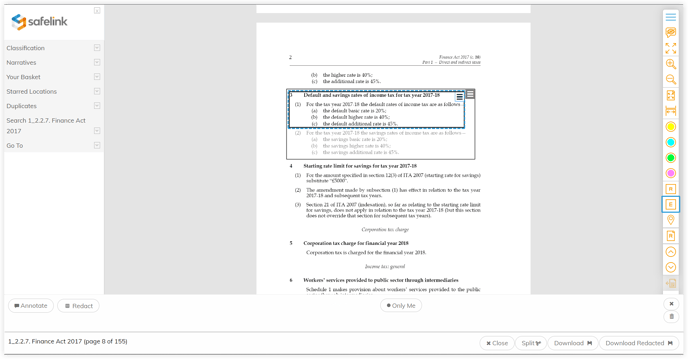
13. You can use the highlight tool to highlight sections of your document.
.png?width=655&height=373&name=How%20to%20Build%20a%20Court%20Bundle%20-%20The%20Basics%20(13).png)
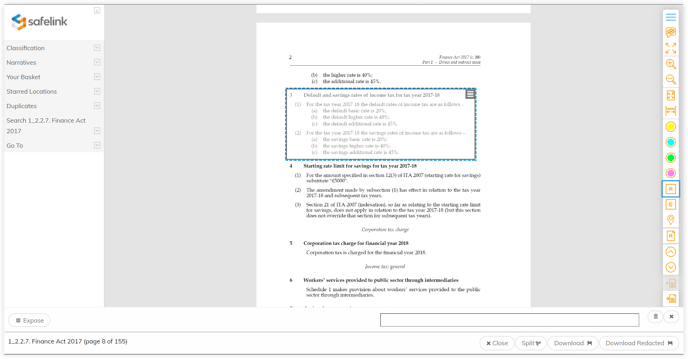
14. You can use the redaction tool to redact sections of your document. .png?width=655&height=371&name=How%20to%20Build%20a%20Court%20Bundle%20-%20The%20Basics%20(14).png)
15. You can use the exposure tool to expose areas of your document underneath your redaction. -2.png?width=655&height=372&name=How%20to%20Build%20a%20Court%20Bundle%20-%20The%20Basics%20(15)-2.png)
-2.png?width=655&height=371&name=How%20to%20Build%20a%20Court%20Bundle%20-%20The%20Basics%20(16)-2.png)
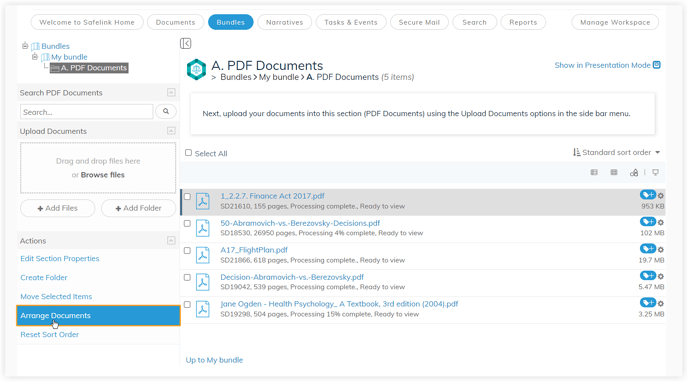
Arrange Files in a Section
17. You can arrange and reorder the documents of your sections by clicking on the grey bar in front of the documents. -3.png?width=655&height=309&name=How%20to%20Build%20a%20Court%20Bundle%20-%20The%20Basics%20(17)-3.png)
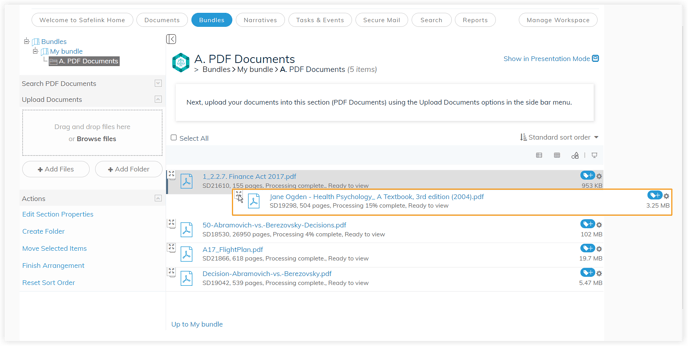
18. Drag and drop your document to reorder it.-4.png?width=655&height=310&name=How%20to%20Build%20a%20Court%20Bundle%20-%20The%20Basics%20(18)-4.png)
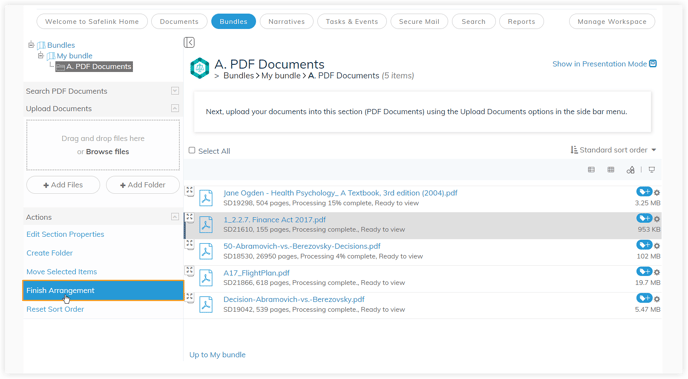
19. Document dropped in the new order.-4.png?width=655&height=307&name=How%20to%20Build%20a%20Court%20Bundle%20-%20The%20Basics%20(19)-4.png)
Add / Create a Custom Coversheet
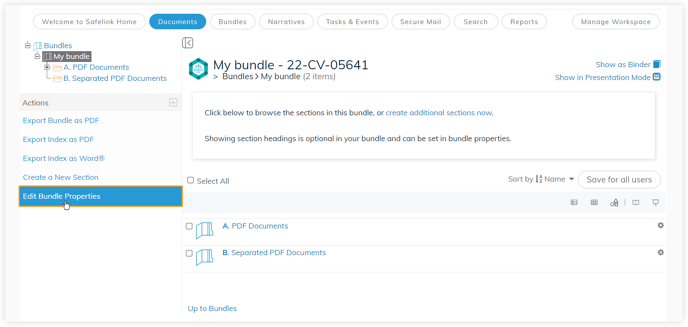
20. Click Edit Bundle Properties.-1.png?width=655&height=310&name=How%20to%20Build%20a%20Court%20Bundle%20-%20The%20Basics%20(20)-1.png)
21. Next, scroll down to Coversheet Settings and click the drop-down menu to display available cover sheet templates.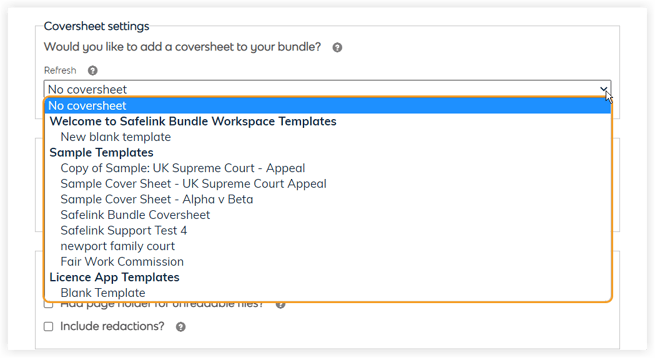
22. Select a coversheet template or New Blank Template to open the editor and create your own. You can create a custom bundle coversheet inside the cover card and spine i. insert and apply an index header for your bundle binder. Your coversheet templates will appear at the bottom of your exported Bundle.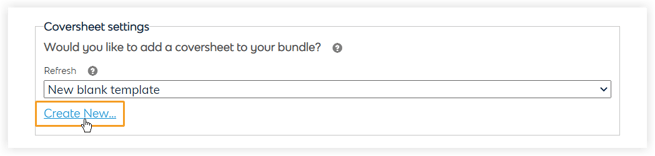
Export your Bundle as a PDF
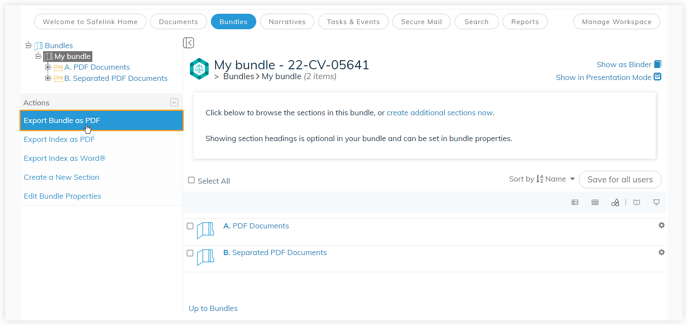
23. When your Bundle is ready for the courtroom, you can export it as a PDF. Click Export Bundle as PDF from the Actions menu.-1.png?width=655&height=307&name=How%20to%20Build%20a%20Court%20Bundle%20-%20The%20Basics%20(23)-1.png)
24. Safelink will build your report, and when it is ready, click Download..png?width=655&height=286&name=How%20to%20Build%20a%20Court%20Bundle%20-%20The%20Basics%20(24).png)
-1.png?width=655&height=322&name=How%20to%20Build%20a%20Court%20Bundle%20-%20The%20Basics%20(25)-1.png)
How to Build a Court Bundle - The Basics ( Gen 3)
Create a Bundle
- Click Create my first Bundle.
- Give your Bundle a name, add your case number then click Create.
Create Sections
- Click Create Sections. You need to create a section before adding documents to your Bundle.
- Enter a section identifier and give your section a name. You can tick Create another section after this one? to add additional sections. Click Create.
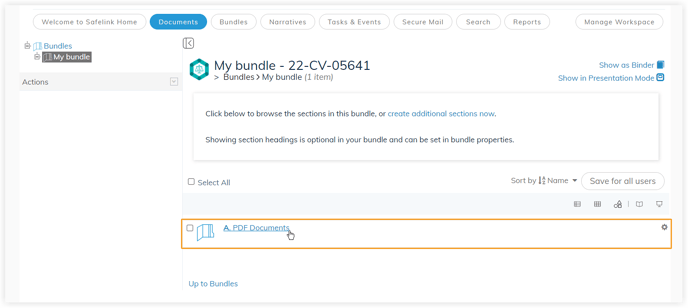
- Click on a section to open it.
Upload PDF Files
- Click Add Files to add individual documents or Add Folders to add entire folders into your workspace.
- Select the file(s) or folder(s) you would like to upload and click Open.
- When your files have finished uploading, click on a document to open it.
View, Highlight, Redact and Expose
- Use your cursor to scroll through the document in Document View. You can use the options on the right to zoom in / zoom out, view an entire page or view the document page width.
- You can use the highlight tool to highlight sections of your document.
- You can use the redaction tool to redact sections of your document.
- You can use the exposure tool to expose areas of your document underneath your redaction.
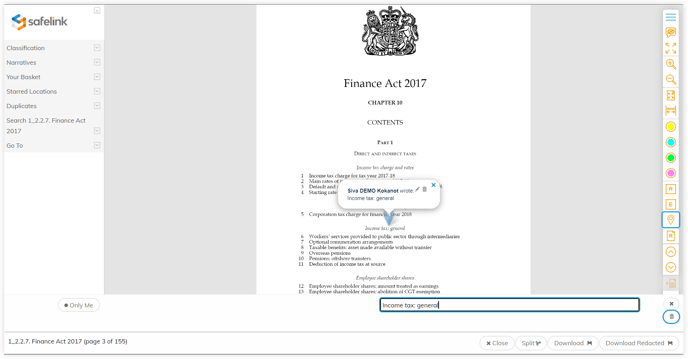
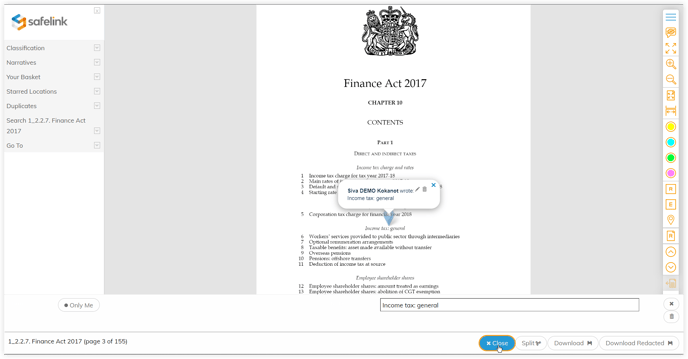
- You can click anywhere on the document to add an annotation or use the Marker tool on the right. Enter your note into the text field on the grey toolbar at the bottom. Click the rubbish bin icon to remove your annotation.
- Click Close to return to the Folder View.
Arrange Files in a Section
- You can arrange and reorder the documents of your sections by clicking Arrange Documents.
- Click the arrange icon, then drag and drop your document to reorder it.
- Then click Finish Arrangement when you are done.
Move Files between Bundle Sections
- You can move documents between your bundles' sections by ticking the box next to the documents you'd like to move and then clicking Move Selected items.
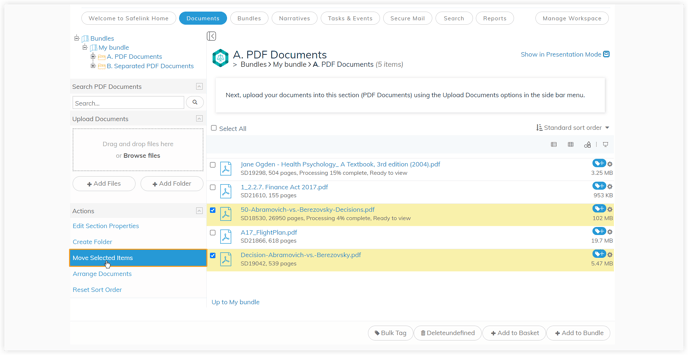
- Next, click the section you would like to move your documents to drop them in.
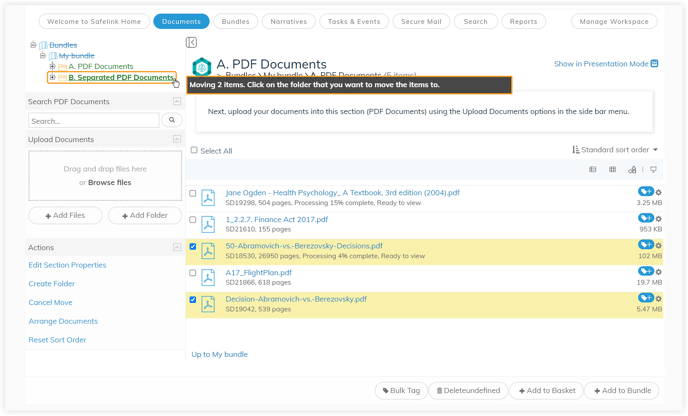
- Lastly, click on your bundle section to view the documents you've just moved.

Add / Create a Custom Coversheet
- Click Edit Bundle Properties.
- Next, scroll down to Coversheet Settings and click the drop-down menu to display your cover sheet templates.

- Select a coversheet template or New Blank Template to open the editor and create your own. You can create a custom bundle coversheet inside the cover card and spine inserts and apply an index header for your bundle binder. Your cover sheet templates will appear at the bottom of your exported Bundle.

Export your Bundle as a PDF
- When your Bundle is ready for the courtroom, you can export it as a PDF. Click Export Bundle as PDF from the Actions menu.
- Safelink will build your report, and when it is ready, click Download.
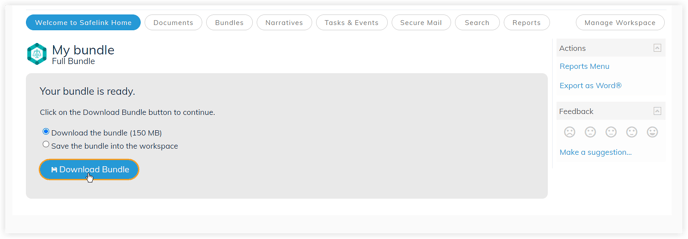
- Open your report to have a look.
Please note that should your workspace be accessible by external parties or ‘non-friendly parties’, folder permissions that apply to the documents area do not apply to bundles. Any document added to a bundle will be viewable to all users within this workspace. To ensure your Bundle's security, we recommend you build it in an internal/team workspace and then publish it in a customer workspace for review.