Create a Court Bundle - Add Sections, Add Documents, View Documents - Gen 4
Create a Court Bundle - Add Sections, Add Documents, View Documents - Gen 3
Create a Court Bundle - Add Sections, Add Documents, View Documents - Gen 4
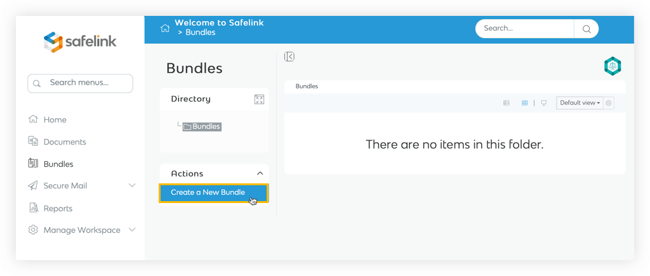
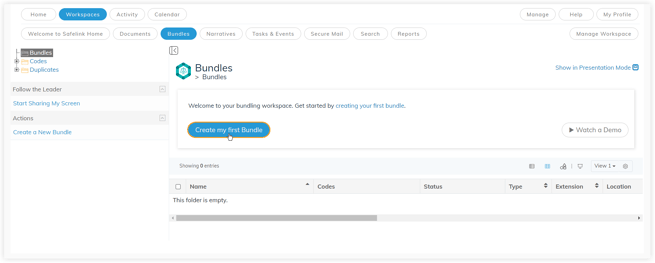
- Click Create a New Bundle.
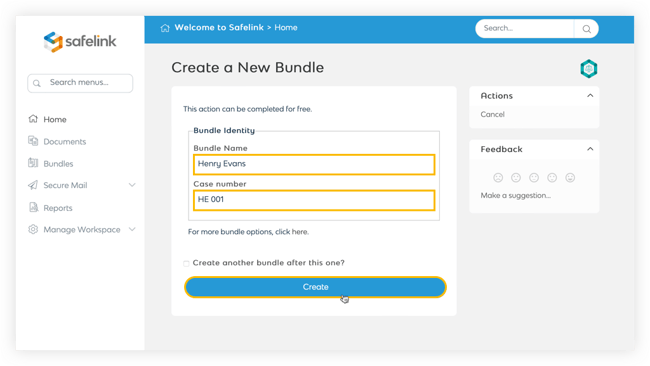
- Enter the Bundle Name and Case Number.
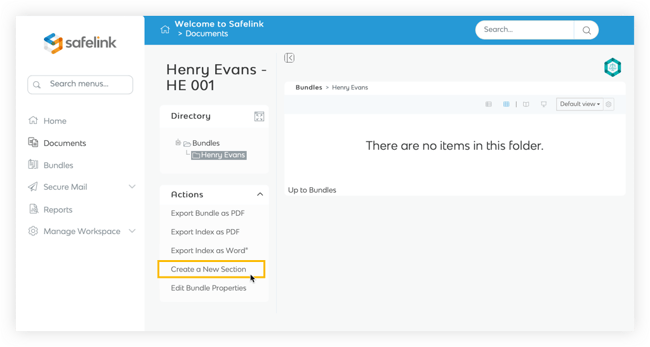
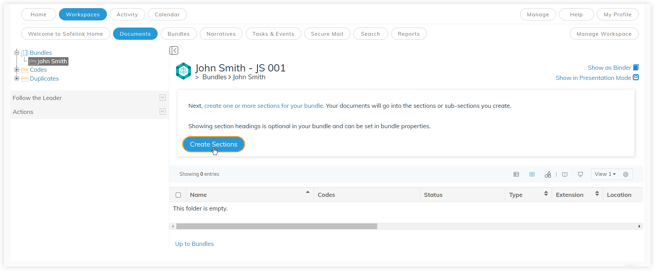
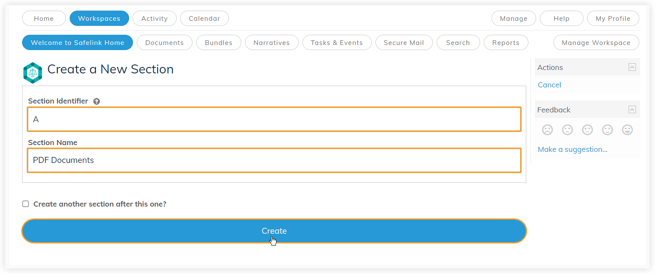
- Click Create a New Section. You need to create a section before adding documents to your bundle.
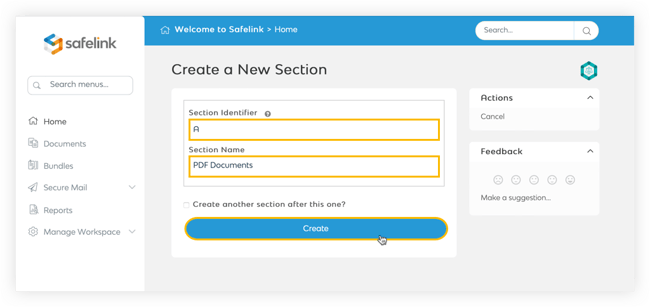
- Enter a section identifier and give your section a name. You can tick Create another section after this one to add additional sections. Click Create.
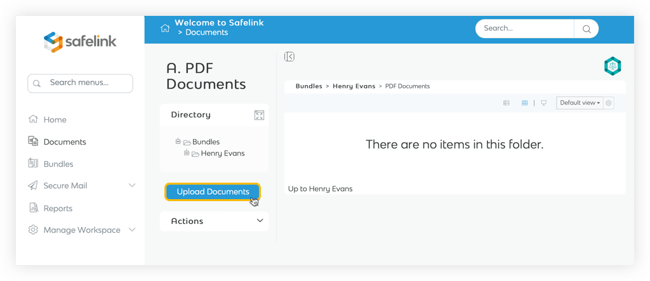
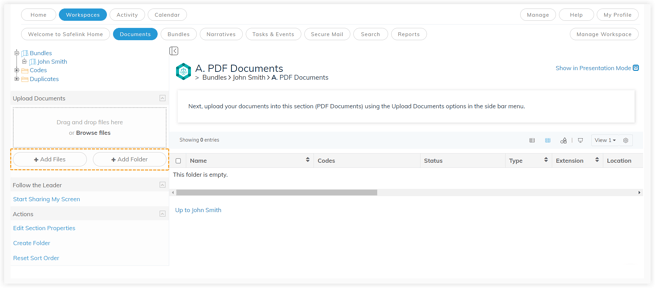
- Please click Upload Documents to upload files.
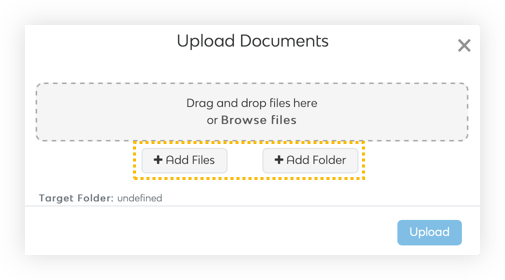
- Click Add Files to add individual documents or Add Folders to add entire folders to your workspace. You can also drag and drop your files and folders in the upload modal.
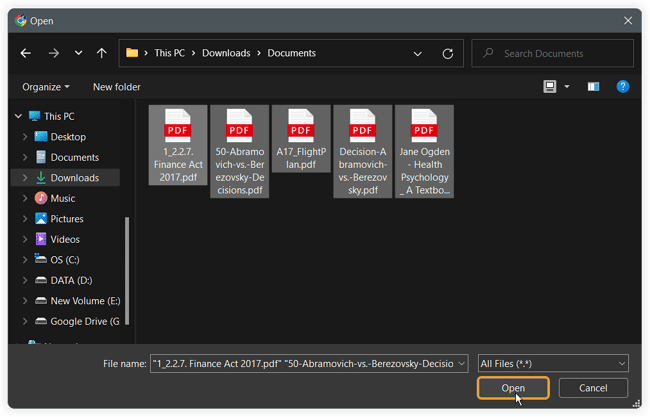
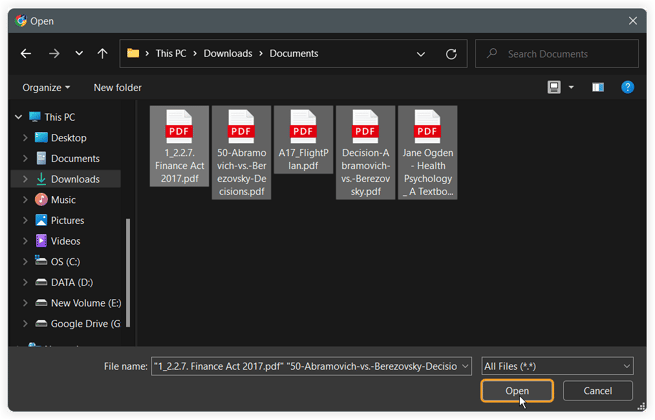
- Select the file(s) or folder(s) you would like to upload and click Open.
- The system will display the list of files to be uploaded. You can add or remove files as needed. When you're ready, please click Upload.

- A progress bar will be displayed to indicate the progress of your upload.
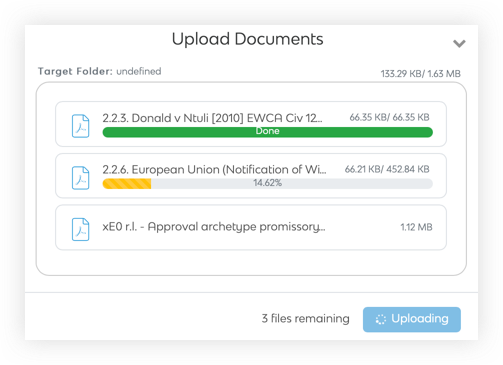 Please note that you cannot add new files to upload or cancel the upload while it is in progress. You can minimise the upload modal while the upload is in progress.
 - Click the Close button to close the upload modal once the upload is complete.
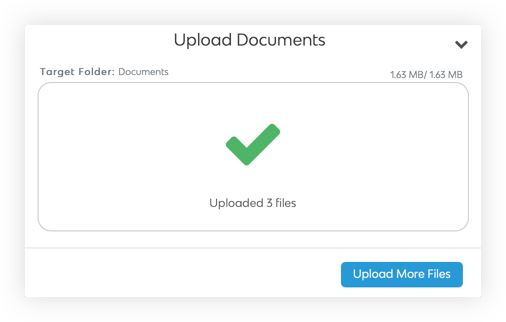
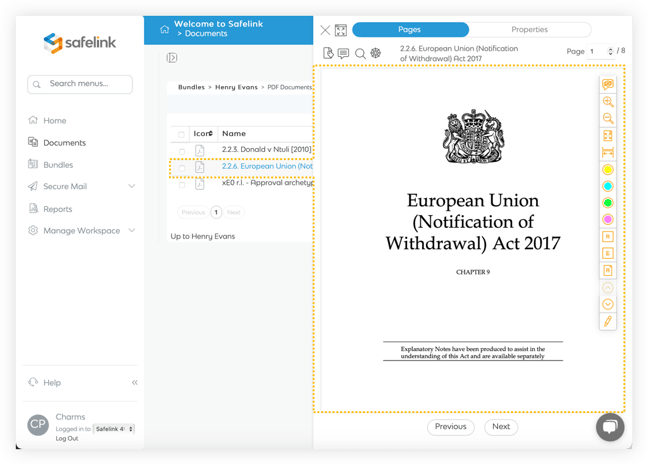
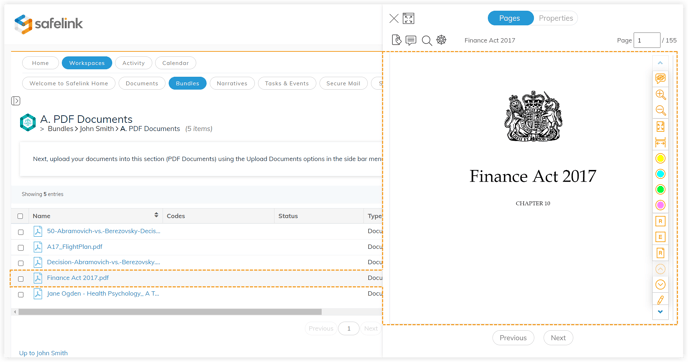
- When your files have finished uploading, you can click on a document to open it.
NOTE: Should your workspace be accessible by external parties or ‘non-friendly parties’, folder permissions that apply to the documents area do not apply to bundles. Any document added to a bundle will be viewable to all users within this workspace. To ensure your bundle's security, we recommend you build it in an internal/team workspace and then publish it in a customer workspace for review.
Create a Court Bundle - Add Sections, Add Documents, View Documents - Gen 3
- Click Create my first bundle.
- Enter the Bundle Name and Case Number.

- Click Create Sections. You need to create a section before adding documents to your bundle.
- Enter a section identifier and give your section a name. You can tick Create another section after this one to add additional sections. Click Create.
- Click Add Files to add individual documents or Add Folders to add entire folders to your workspace.
- Select the file(s) or folder(s) you would like to upload and click Open.
- When your files have finished uploading, you can click on a document to open it.
NOTE: Should your workspace be accessible by external parties or ‘non-friendly parties’, folder permissions that apply to the documents area do not apply to bundles. Any document added to a bundle will be viewable to all users within this workspace. To ensure your bundle's security, we recommend you build it in an internal/team workspace and then publish it in a customer workspace for review.