How to Access User Permissions
- Go to Users & Groups.
- Select User Permissions.
- A table showing all users and available permissions will be displayed
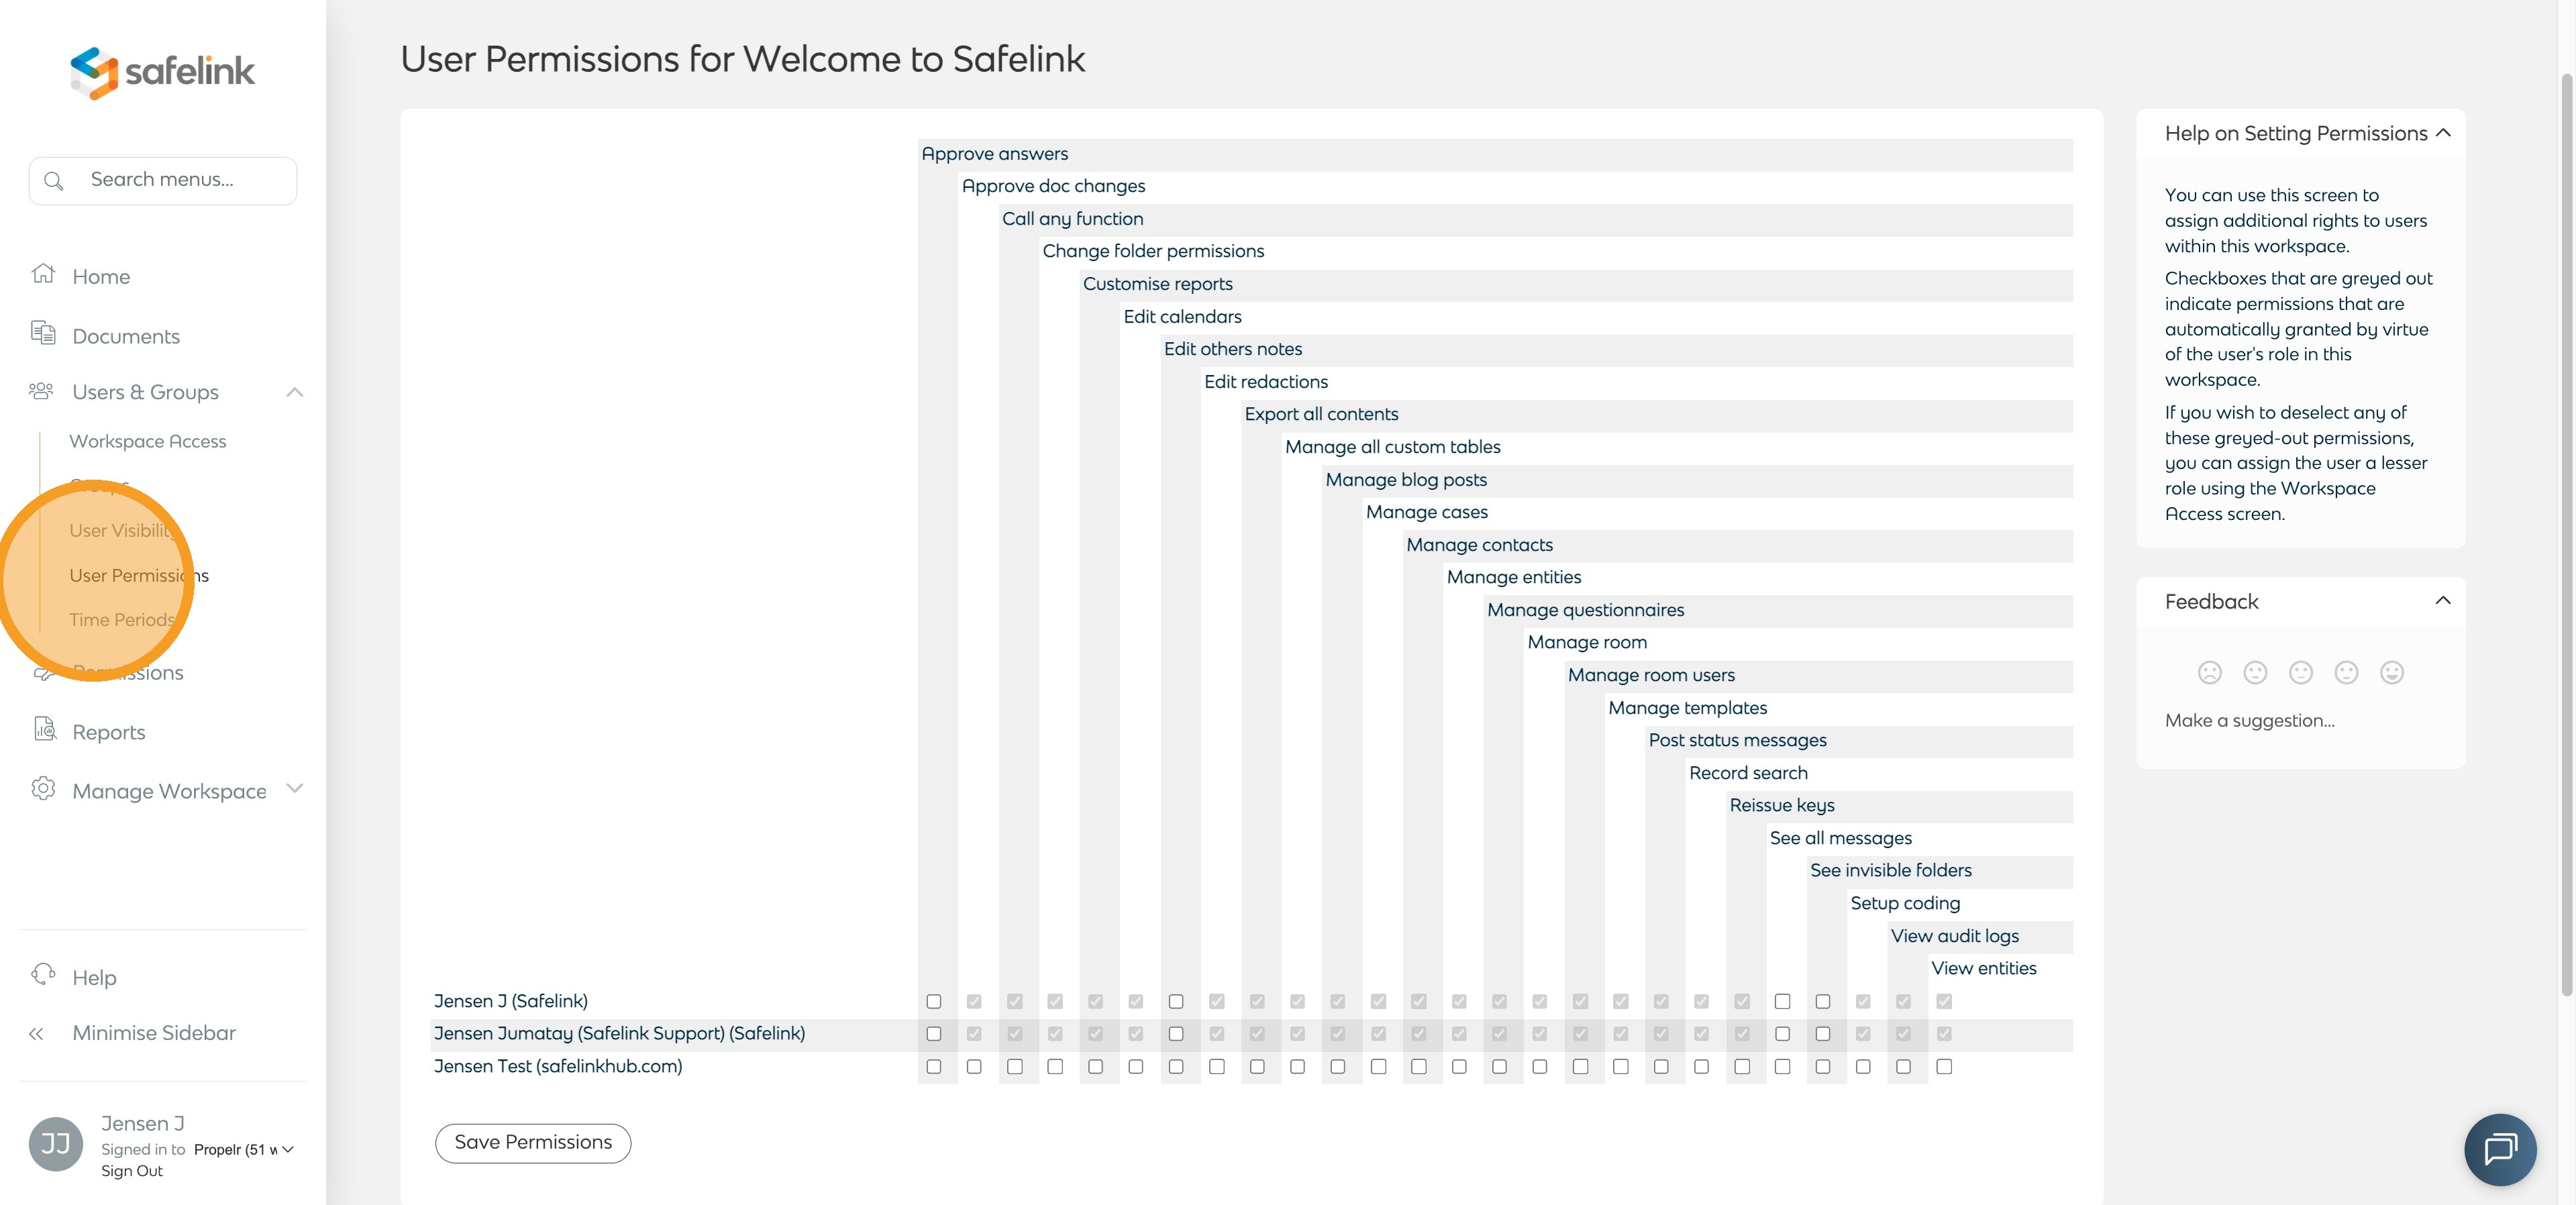
Understanding the Table
The table is organised as follows:
- Rows: Each user in the workspace (listed alphabetically)
- Columns: Available permissions that can be assigned
- Checkboxes: Indicate whether a permission is enabled for a user
Permission States
Checked (Enabled)
- The user has this permission
- You may untick it to remove access
Unchecked (Disabled)
- The user does not have this permission
- You may tick it to grant access
Greyed out (Locked)
- The permission is automatically granted via the user’s role
- It cannot be changed individually
- To remove it, you will need to assign a different role with fewer permissions
How to Modify Permissions
- Locate the user in the left-hand column
- Find the relevant permission in the header row
- Tick or untick the checkbox as required
- Select Save Permissions at the bottom of the page
Role-Based vs Individual Permissions
Role-Based Permissions (Greyed out)
- Assigned automatically based on the user’s role
- Cannot be edited individually
- To change them, update the user’s role
Individual Permissions (Editable)
- Can be granted or removed manually
- Can extend or restrict role-based access
- Useful for fine-tuning user capabilities
Tips
- Greyed-out permissions come from the user’s role and cannot be changed individually
- You can make multiple changes before selecting Save Permissions